How to file invoice PDFs by month on Mac
PDFs mentioning invoice filed into Invoices by year, renamed by the date inside
Intermediate · About 4 minutes
In this guide
What this does
Invoices tend to land with unhelpful filenames like “download.pdf” or a supplier’s own internal reference number, and the date they arrived rarely matches the date on the invoice itself. This rule finds PDFs that mention “invoice”, either in the filename or inside the document’s own text, then renames each one using the date actually printed inside it and files it into an Invoices folder organized by year.
What you’ll build
A rule that matches PDFs mentioning invoice, renames each using the date found inside the document, then sorts it into a year folder under Invoices.
Open the rule editor
This walkthrough happens inside FilesAutomator itself, so install it from the Mac App Store first if you have not already, then open it. In its toolbar, choose Add, then New Automation Rule.
Name the rule and choose a folder
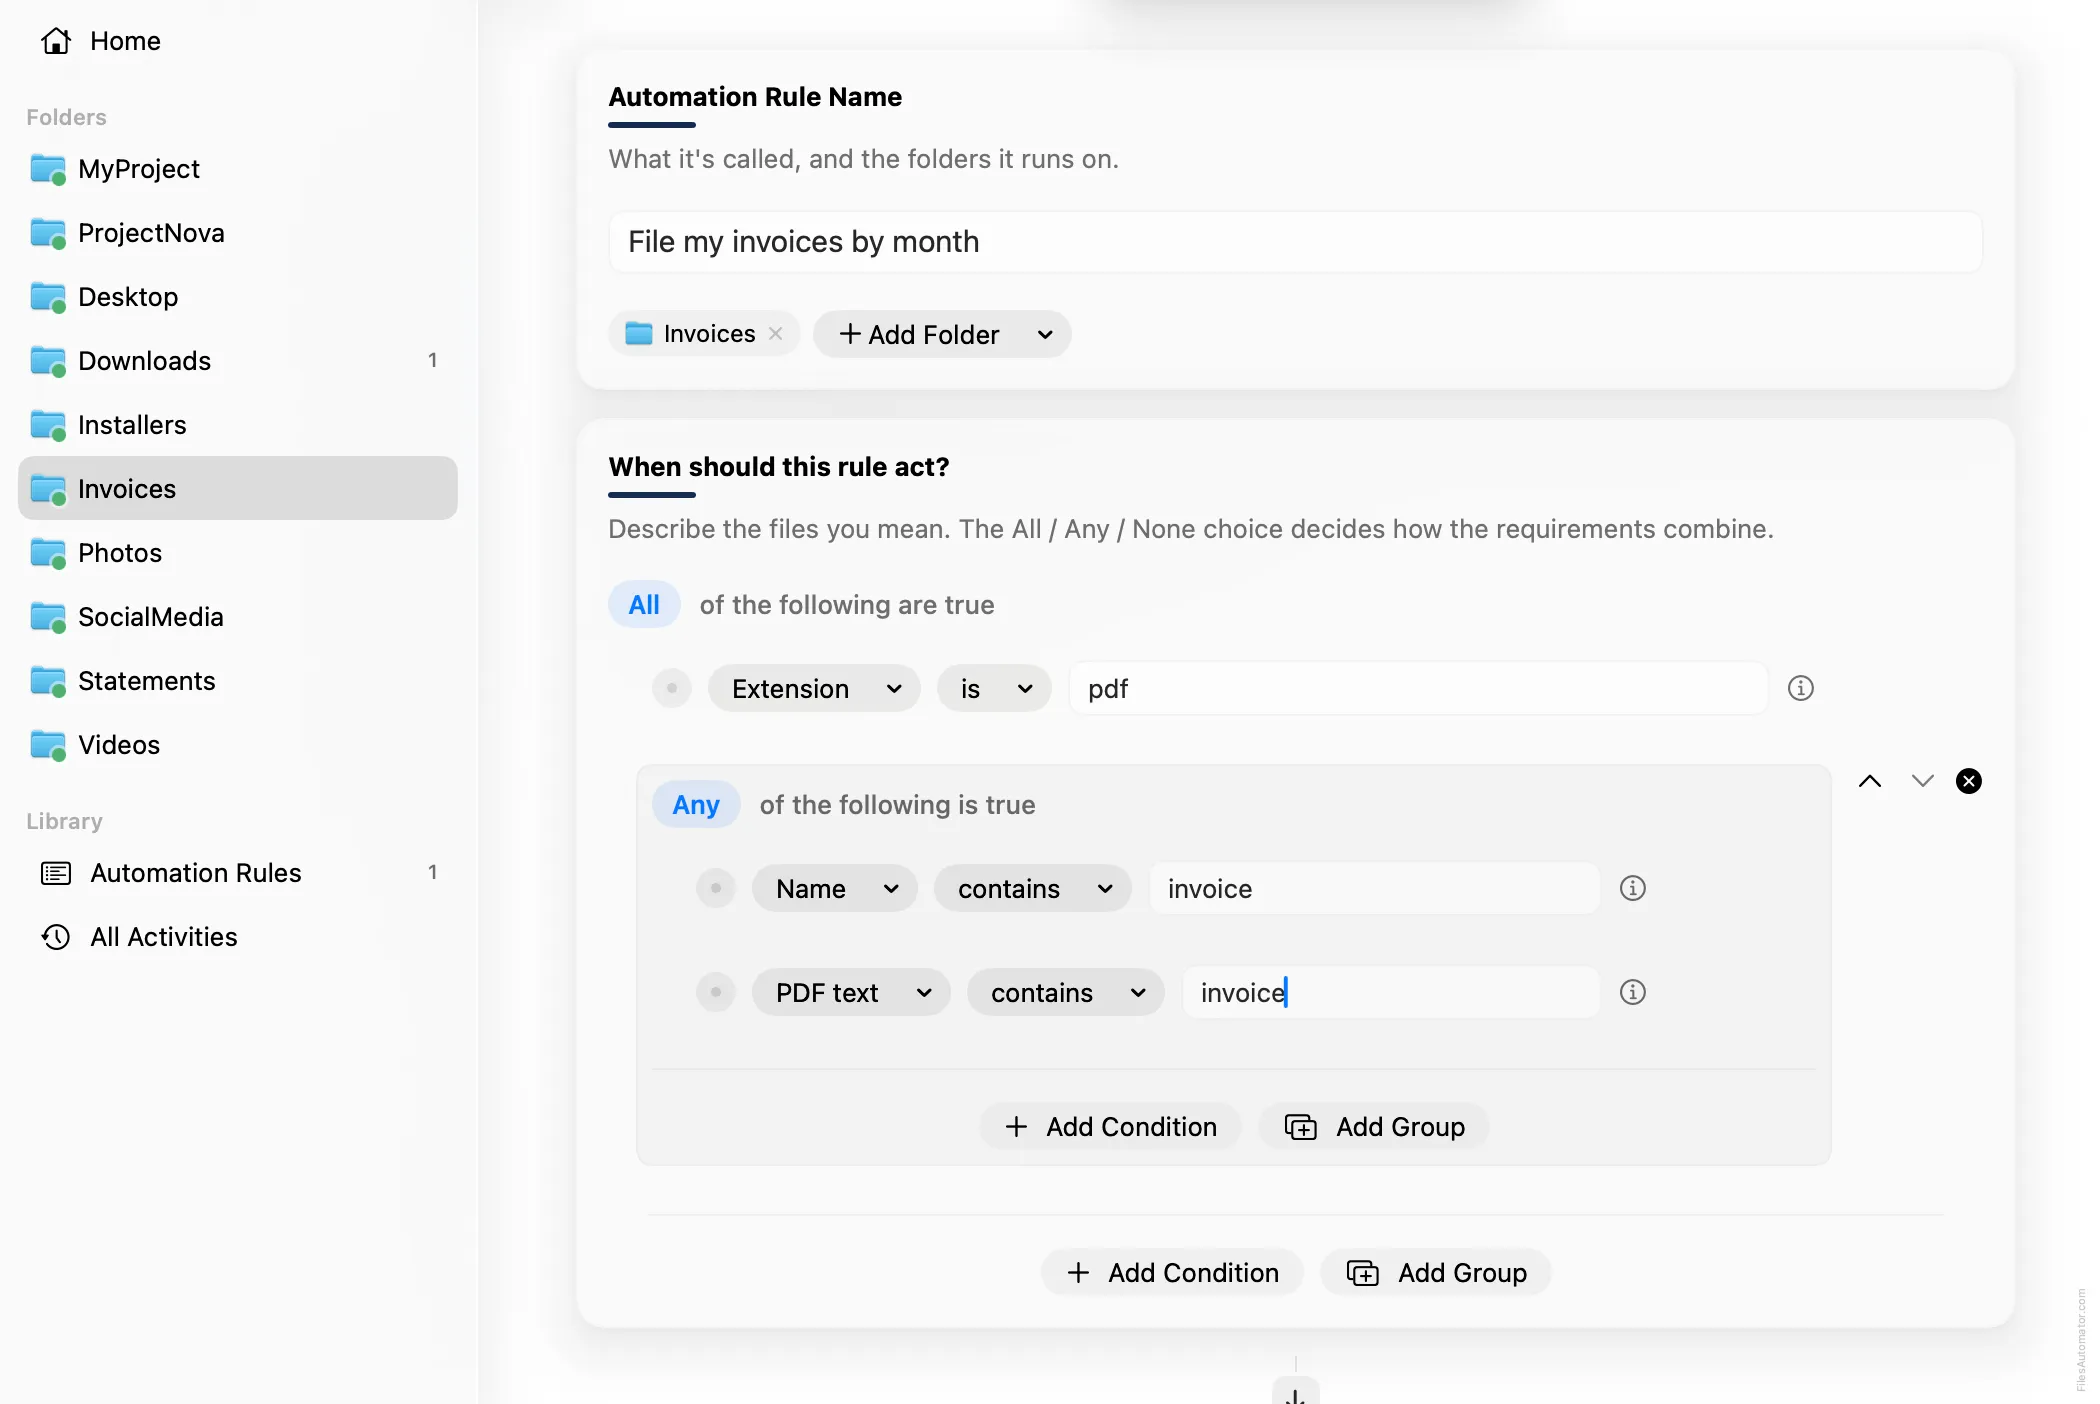
Name it something like “File my invoices by month” and use Add Folder to choose the folder your invoices land in, for example Downloads or an email attachments folder.
Build the condition
Leave the top group set to “All of the following are true”.
Add a condition: Extension is pdf.
Then choose Add Group to nest a second group inside the first, and set that inner group’s operator to “Any of the following is true”. Inside it, add two conditions: Name contains invoice, and PDF text contains invoice. This way a PDF qualifies whether the word shows up in its filename or only inside the document itself.
Add the action steps
Step 1: Rename
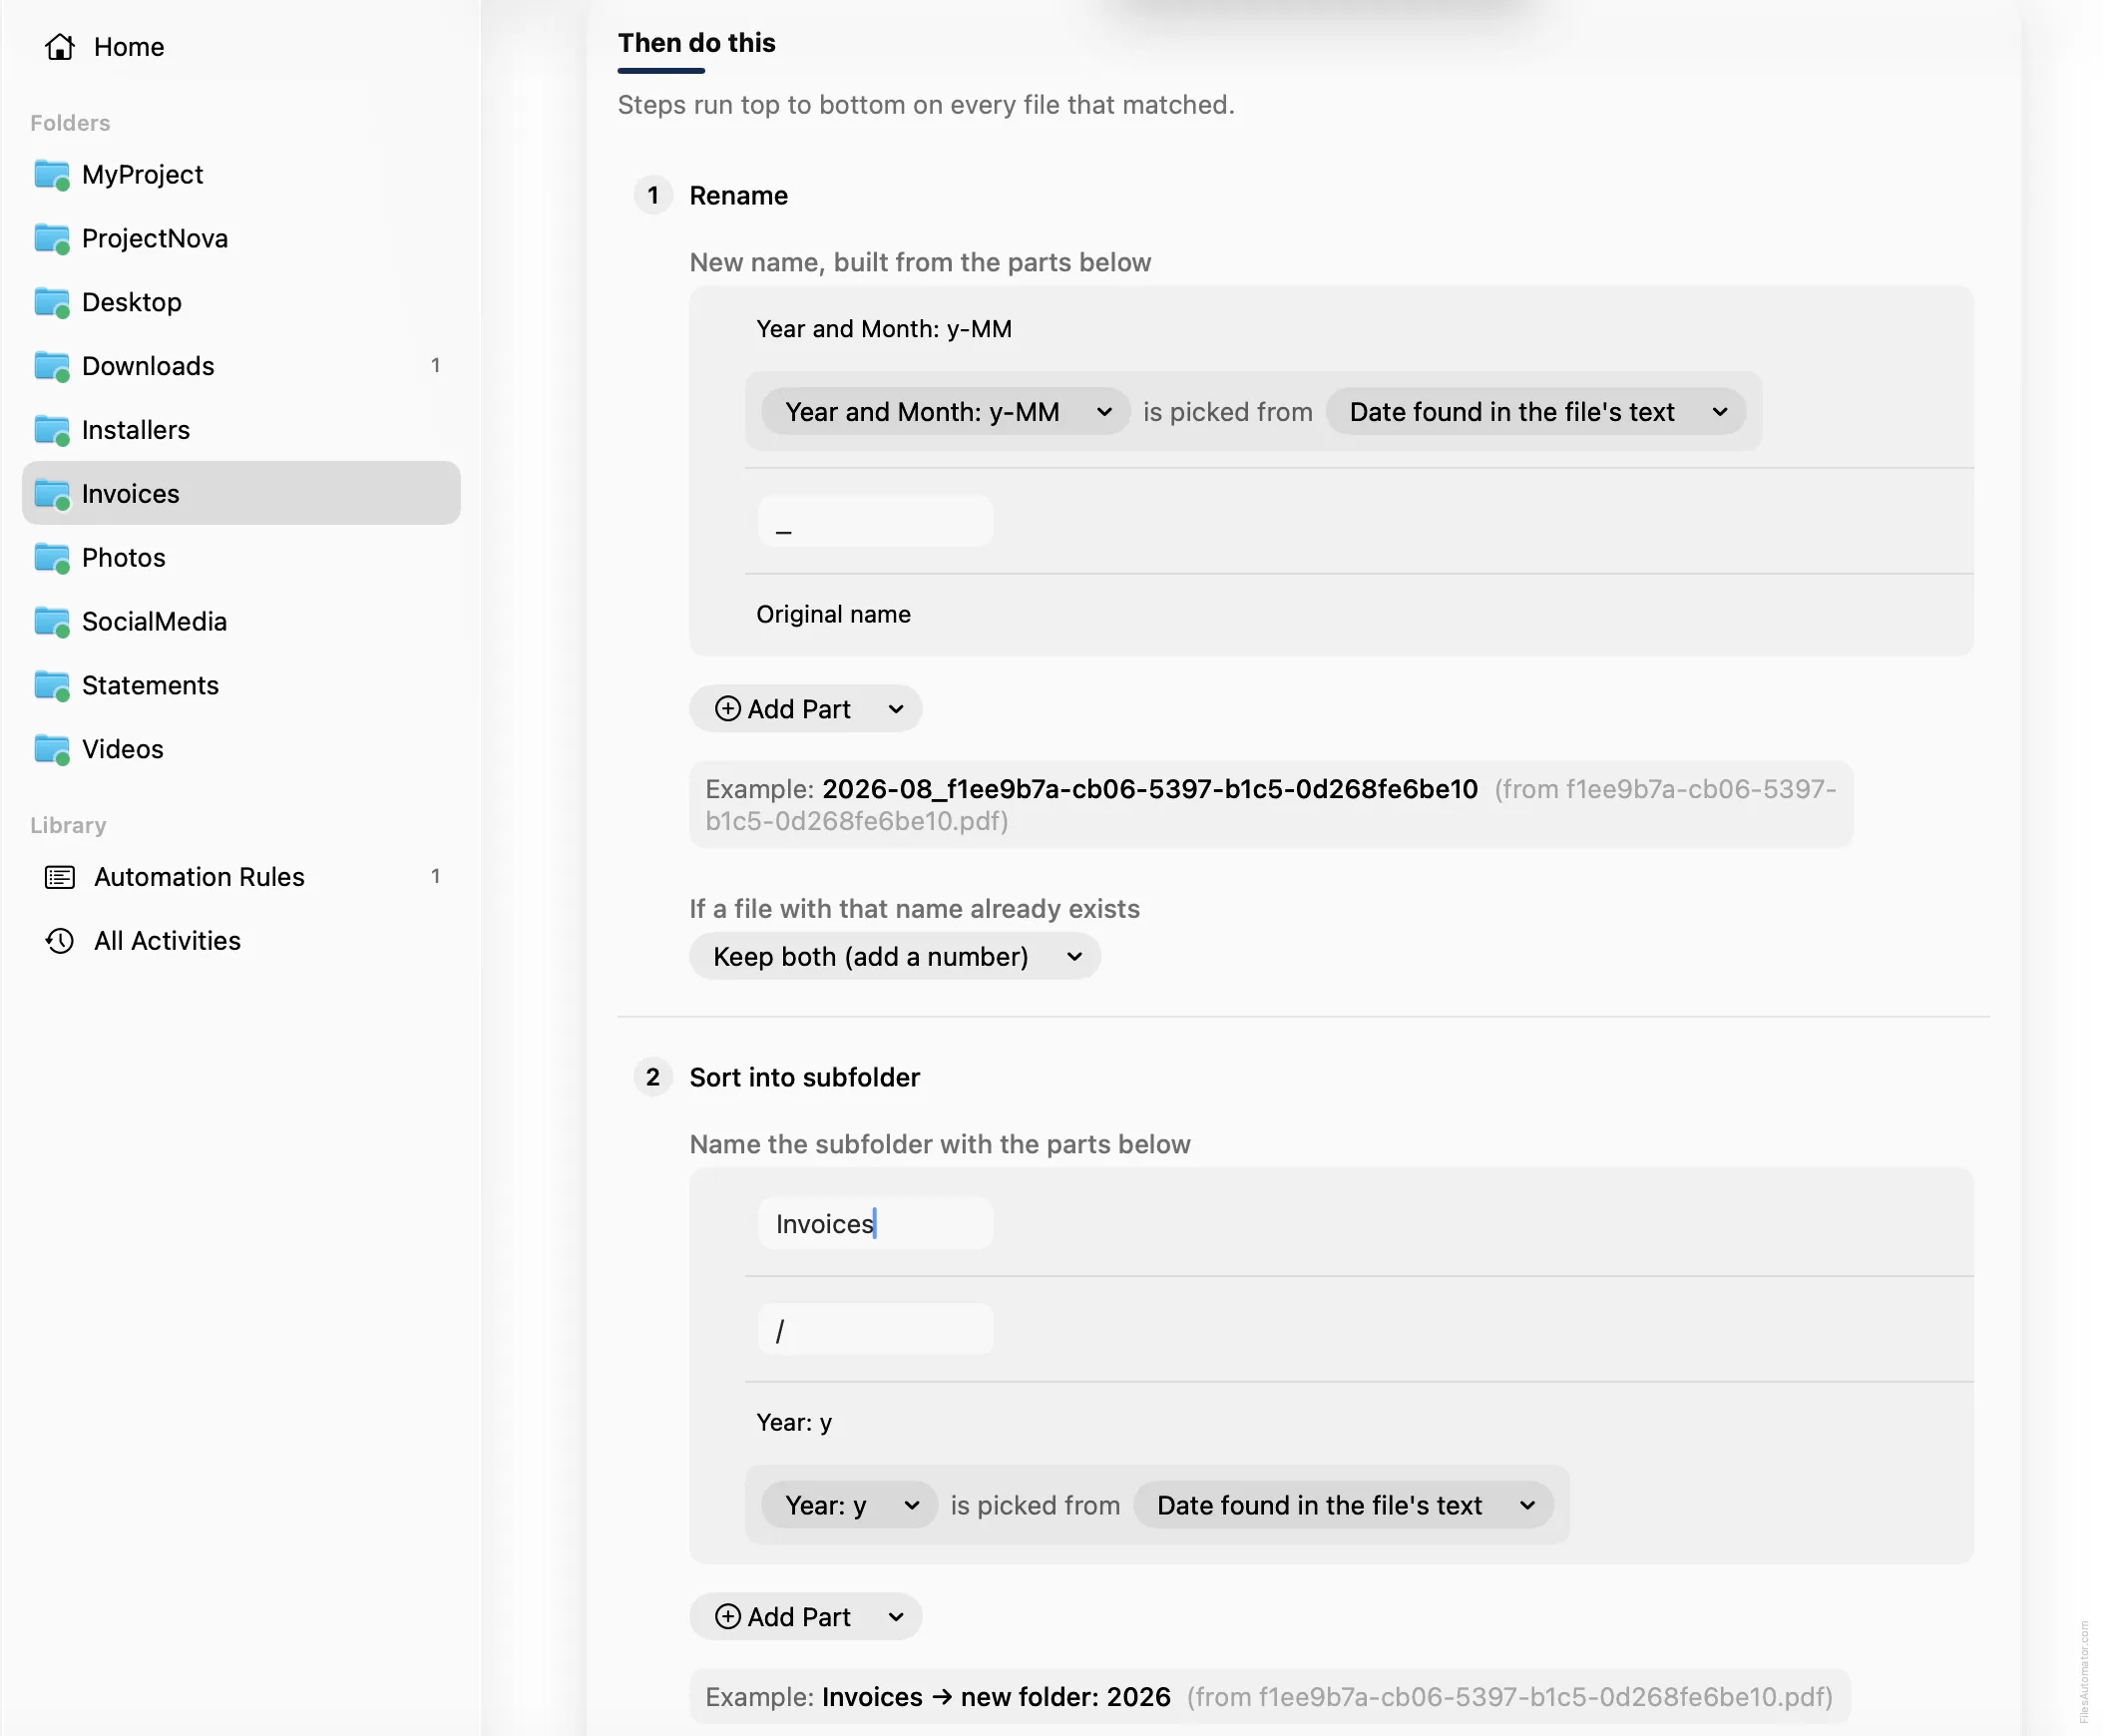
Choose Add Step, then Rename. In “New name, built from the parts below”, use Add Part, then Date,
then Year and Month: y-MM. Change that chip’s source to Date found in the file’s text, since
the invoice’s own printed date matters here, not the day it happened to be downloaded. Add Part
again, choose Text, and type an underscore. Add Part once more and choose Original name.
Step 2: Sort into subfolder
Choose Add Step again, then Sort into folder. In “Name the subfolder with the parts below”, use Add Part, choose Text, and type “Invoices”. Add Part again and choose Subfolder separator ( / ). Add Part once more, choose Date, then Year: y, and change its source to Date found in the file’s text.
Turn it on
Select Create Automation Rule, then switch the rule on. Every matching PDF now files itself under the year it was actually invoiced, named for that same date.
A faster way
The template gallery inside FilesAutomator already has this rule ready to install, named File invoices by month.
Related rules
How to organize bank statement PDFs by month on Mac
PDFs mentioning statement filed into Statements by year, renamed by the date inside
How to rename invoices with the invoice number on Mac
PDFs mentioning invoice renamed using the invoice number found inside, for example INV-1049
How to tag receipts and invoices automatically on Mac
PDFs mentioning receipt or invoice get tagged, without moving or renaming anything
Get FilesAutomator
Everything in this guide happens inside FilesAutomator itself. Download it free from the Mac App Store to follow along, or to install this exact rule from the template gallery in one click instead of building it by hand.
Download on the App Store