How to organize bank statement PDFs by month on Mac
PDFs mentioning statement filed into Statements by year, renamed by the date inside
Intermediate · About 4 minutes
In this guide
What this does
Bank statements downloaded from a banking app or website usually arrive with an unhelpful filename and no obvious way to tell one month from another at a glance. This rule is the same shape as filing invoices by month, but tuned for statements: it finds PDFs mentioning “statement”, renames each using the date printed inside it, and files it into a Statements folder organized by year.
What you’ll build
A rule that matches PDFs mentioning statement, renames each using the date found inside the document, then sorts it into a year folder under Statements.
If your statements are password protected
Optional, skip this if your bank does not lock its PDF exports. Many banks add a password to protect the statement, often a number tied to the account, so the file cannot be opened without it. FilesAutomator can unlock these on its own once you save the password.
Set it up first:
- Open Settings inside FilesAutomator and choose Saved Passwords.
- Select Add a Saved Password.
- Give it a short description, such as “Chase statement password,” and enter the password.
- Save it.
Where that password lives:
- It is stored in your Mac’s own login keychain, the private, encrypted storage macOS itself is built on.
- It will not appear in the Passwords app. That app only lists things like website logins and Wi-Fi networks. FilesAutomator keeps its own separate entry, one that only FilesAutomator can read.
- FilesAutomator never writes the password into its own rule file, and never sends it anywhere. It stays on your Mac.
Once it is saved, come back and finish building the rule below. Because this rule’s condition checks the PDF’s text, a “If the PDF needs a password” choice appears near the bottom of the “When should this rule act?” card once you add that condition. Choose Use one saved password and pick the one you just added, or Try every saved password if this folder receives statements from more than one bank.
Open the rule editor
This walkthrough happens inside FilesAutomator itself, so install it from the Mac App Store first if you have not already, then open it. In its toolbar, choose Add, then New Automation Rule.
Name the rule and choose a folder
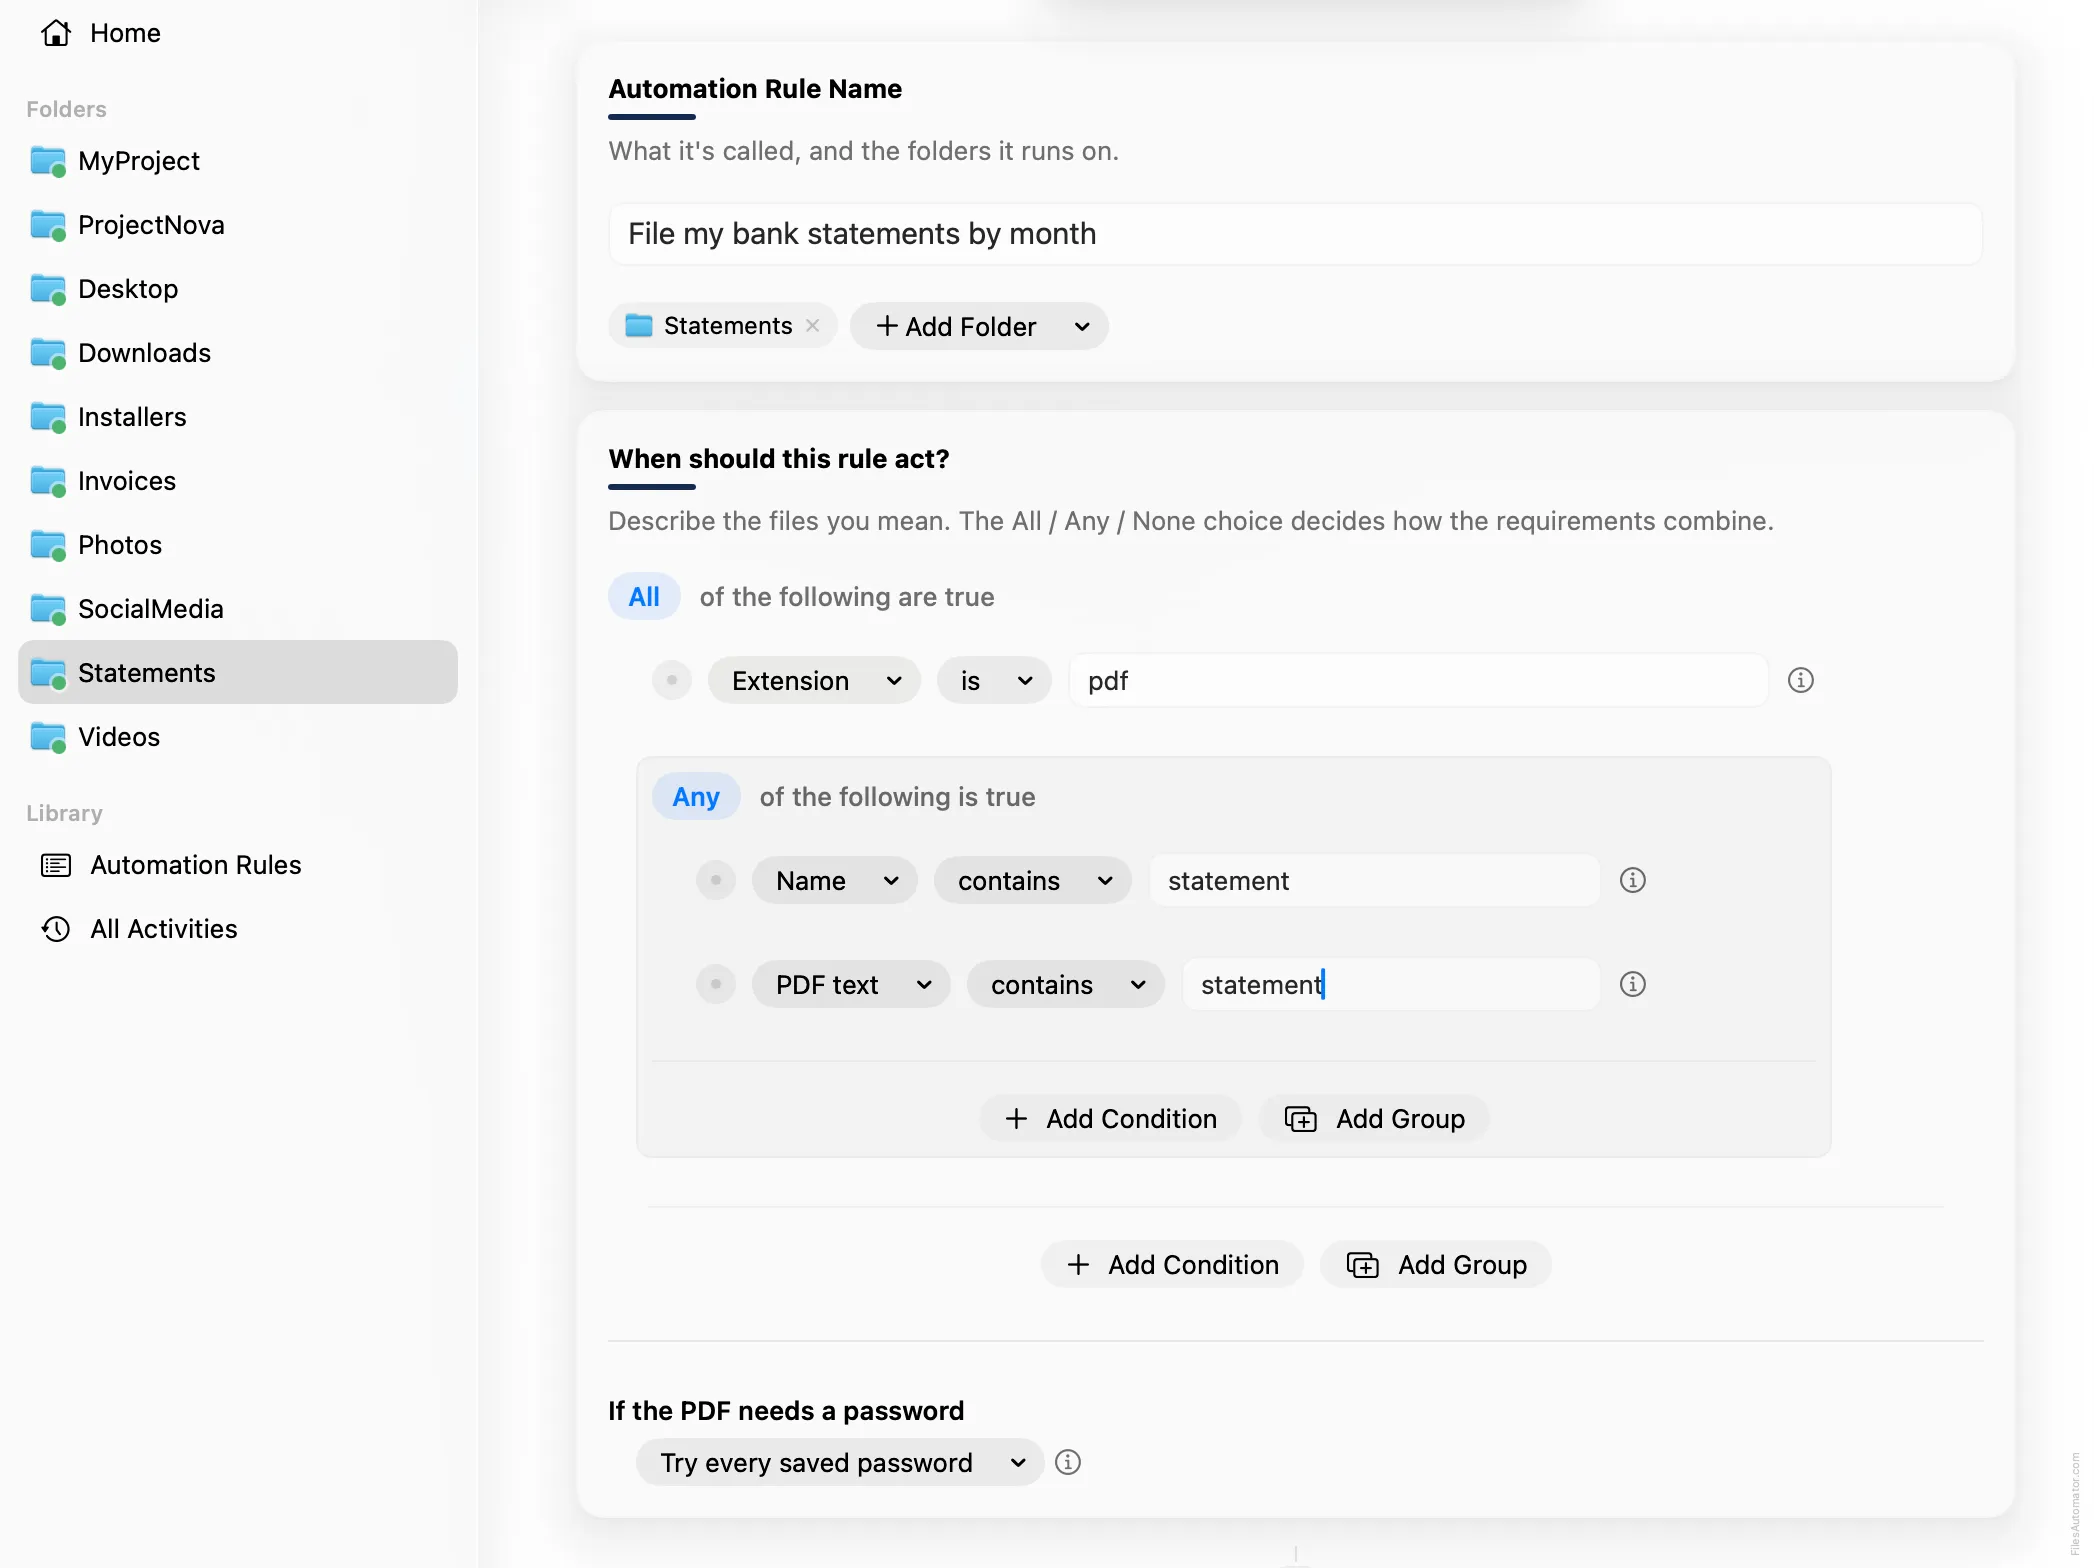
Name it something like “File my bank statements by month” and use Add Folder to choose the folder your statements land in.
Build the condition
Leave the top group set to “All of the following are true”.
Add a condition: Extension is pdf.
Choose Add Group to nest a second group, set its operator to “Any of the following is true”, and add two conditions inside it: Name contains statement, and PDF text contains statement.
If your statements are password protected, this is the point where the “If the PDF needs a password” choice shows up near the bottom of the card. Pick the saved password you added earlier so FilesAutomator can read the text inside a locked statement.
Add the action steps
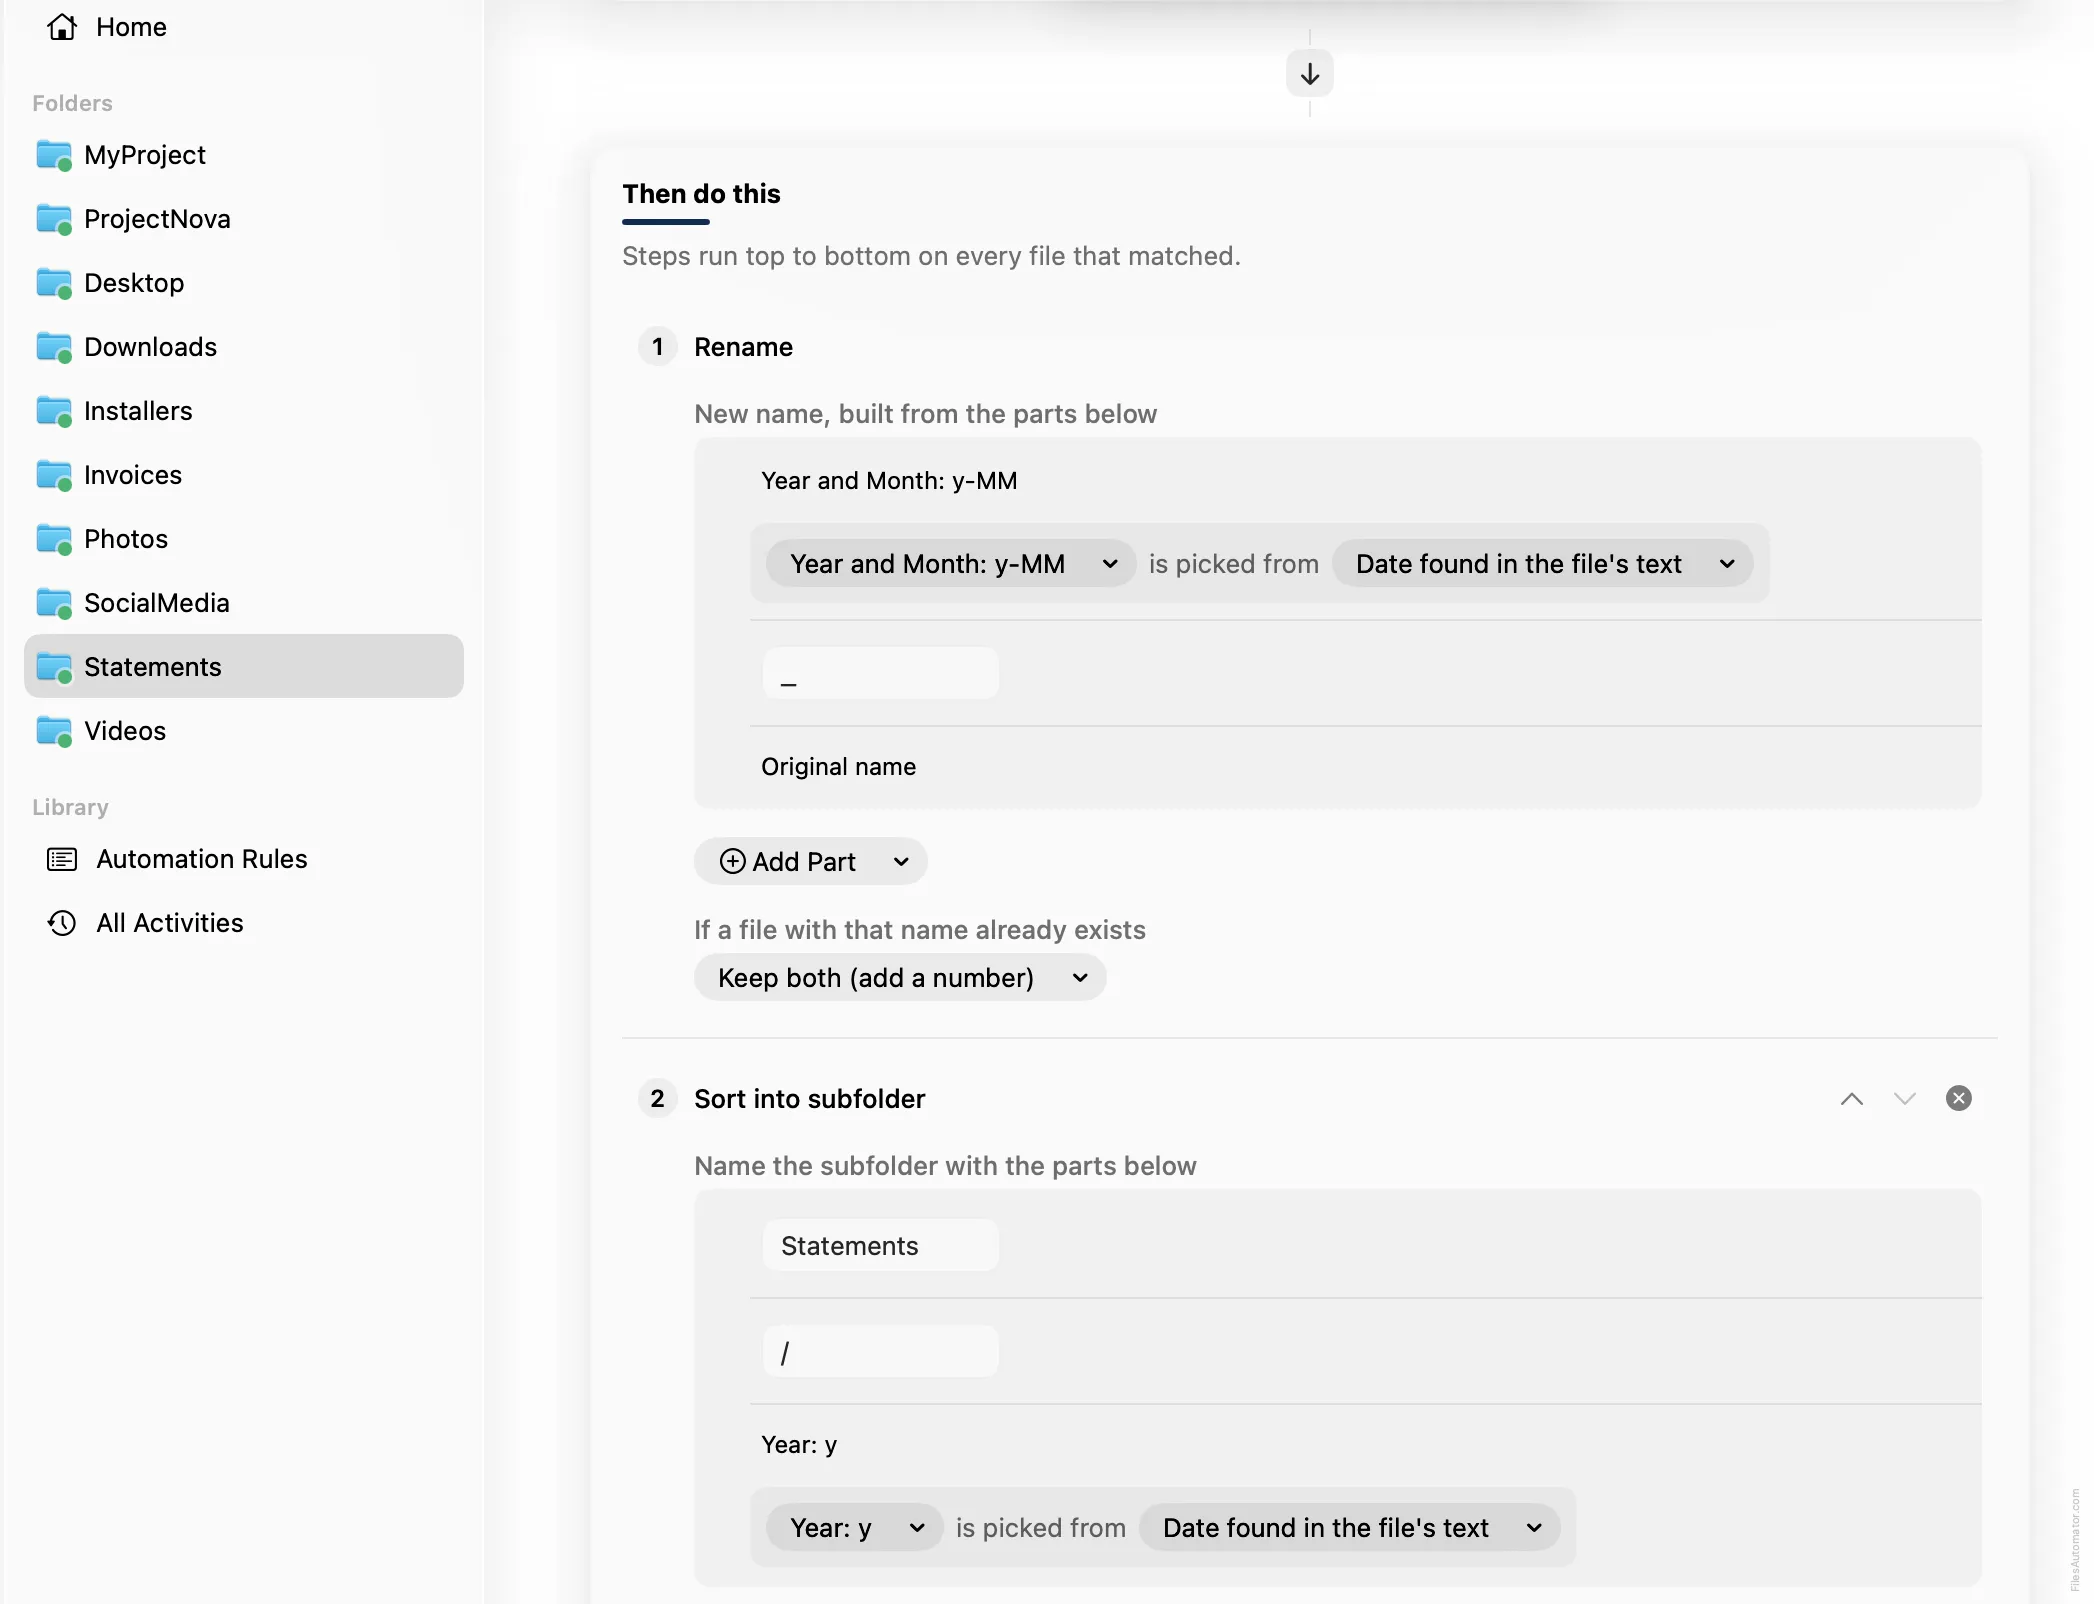
Step 1: Rename
Choose Add Step, then Rename. In “New name, built from the parts below”, use Add Part, then Date,
then Year and Month: y-MM. Change that chip’s source to Date found in the file’s text. Add
Part again, choose Text, and type an underscore. Add Part once more and choose Original name.
Step 2: Sort into subfolder
Choose Add Step again, then Sort into folder. In “Name the subfolder with the parts below”, use Add Part, choose Text, and type “Statements”. Add Part again and choose Subfolder separator ( / ). Add Part once more, choose Date, then Year: y, and change its source to Date found in the file’s text.
Turn it on
Select Create Automation Rule, then switch the rule on. Every matching statement now files itself under the right year, named for the date printed on it.
A faster way
The template gallery inside FilesAutomator already has this rule ready to install, named File bank statements by month.
Related rules
Get FilesAutomator
Everything in this guide happens inside FilesAutomator itself. Download it free from the Mac App Store to follow along, or to install this exact rule from the template gallery in one click instead of building it by hand.
Download on the App Store