How to tag large files automatically on Mac
Files over 500 MB get a Large tag for easy cleanup
Beginner · About 1 minute
In this guide
What this does
When disk space runs low, the usual first step is hunting down whatever’s taking up the most room. This rule does that hunting for you ahead of time: it tags every file over 500 MB with a Large Finder tag the moment it lands, so you can pull up every big file across a folder with a quick Finder search whenever you actually need to clean up.
What you’ll build
A rule that matches any file over 500 MB, then tags it Large.
Open the rule editor
This walkthrough happens inside FilesAutomator itself, so install it from the Mac App Store first if you have not already, then open it. In its toolbar, choose Add, then New Automation Rule.
Name the rule and choose a folder
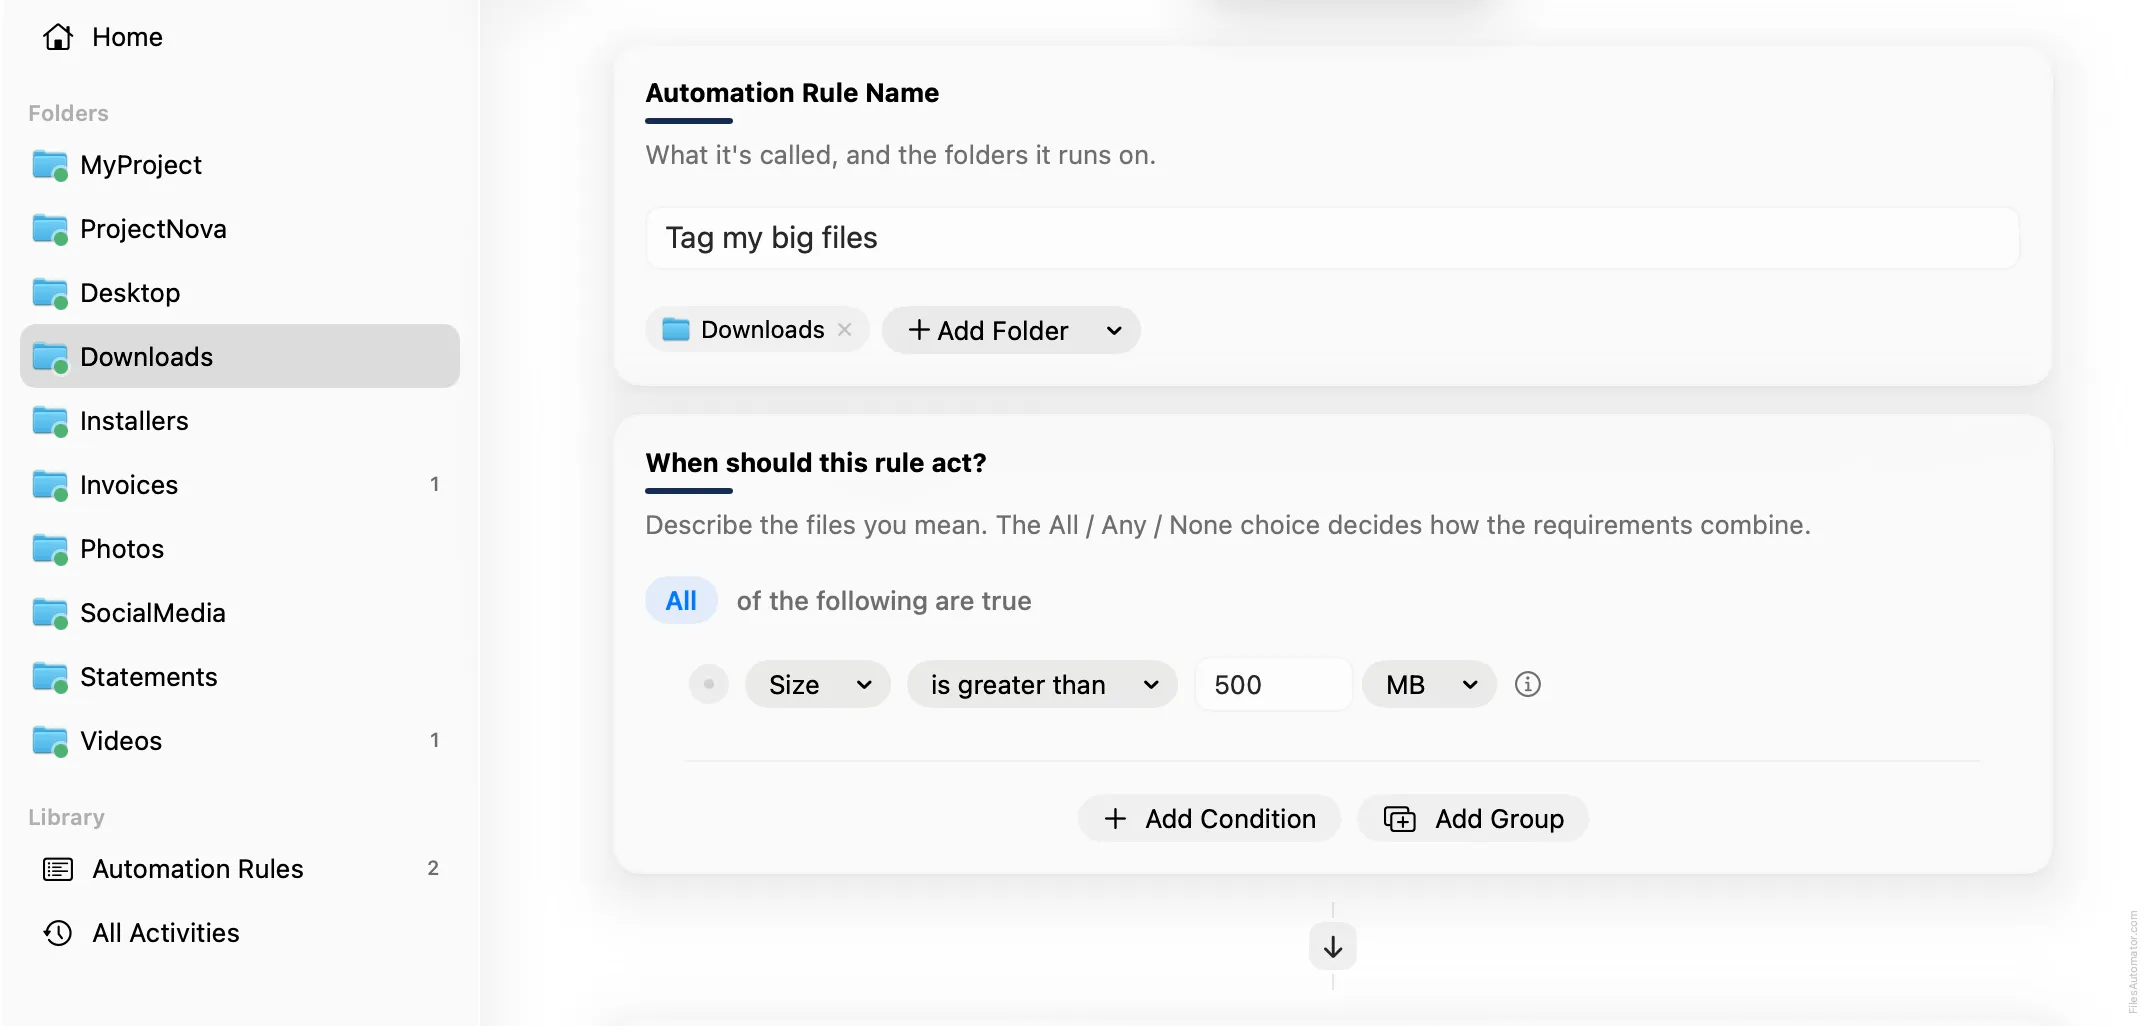
Name it something like “Tag my big files” and use Add Folder to choose the folder you want watched for large files.
Build the condition
Add a single condition: Size is greater than, then enter 500 and choose MB from the unit menu next to the value field.
Add the action steps
Step 1: Add tags
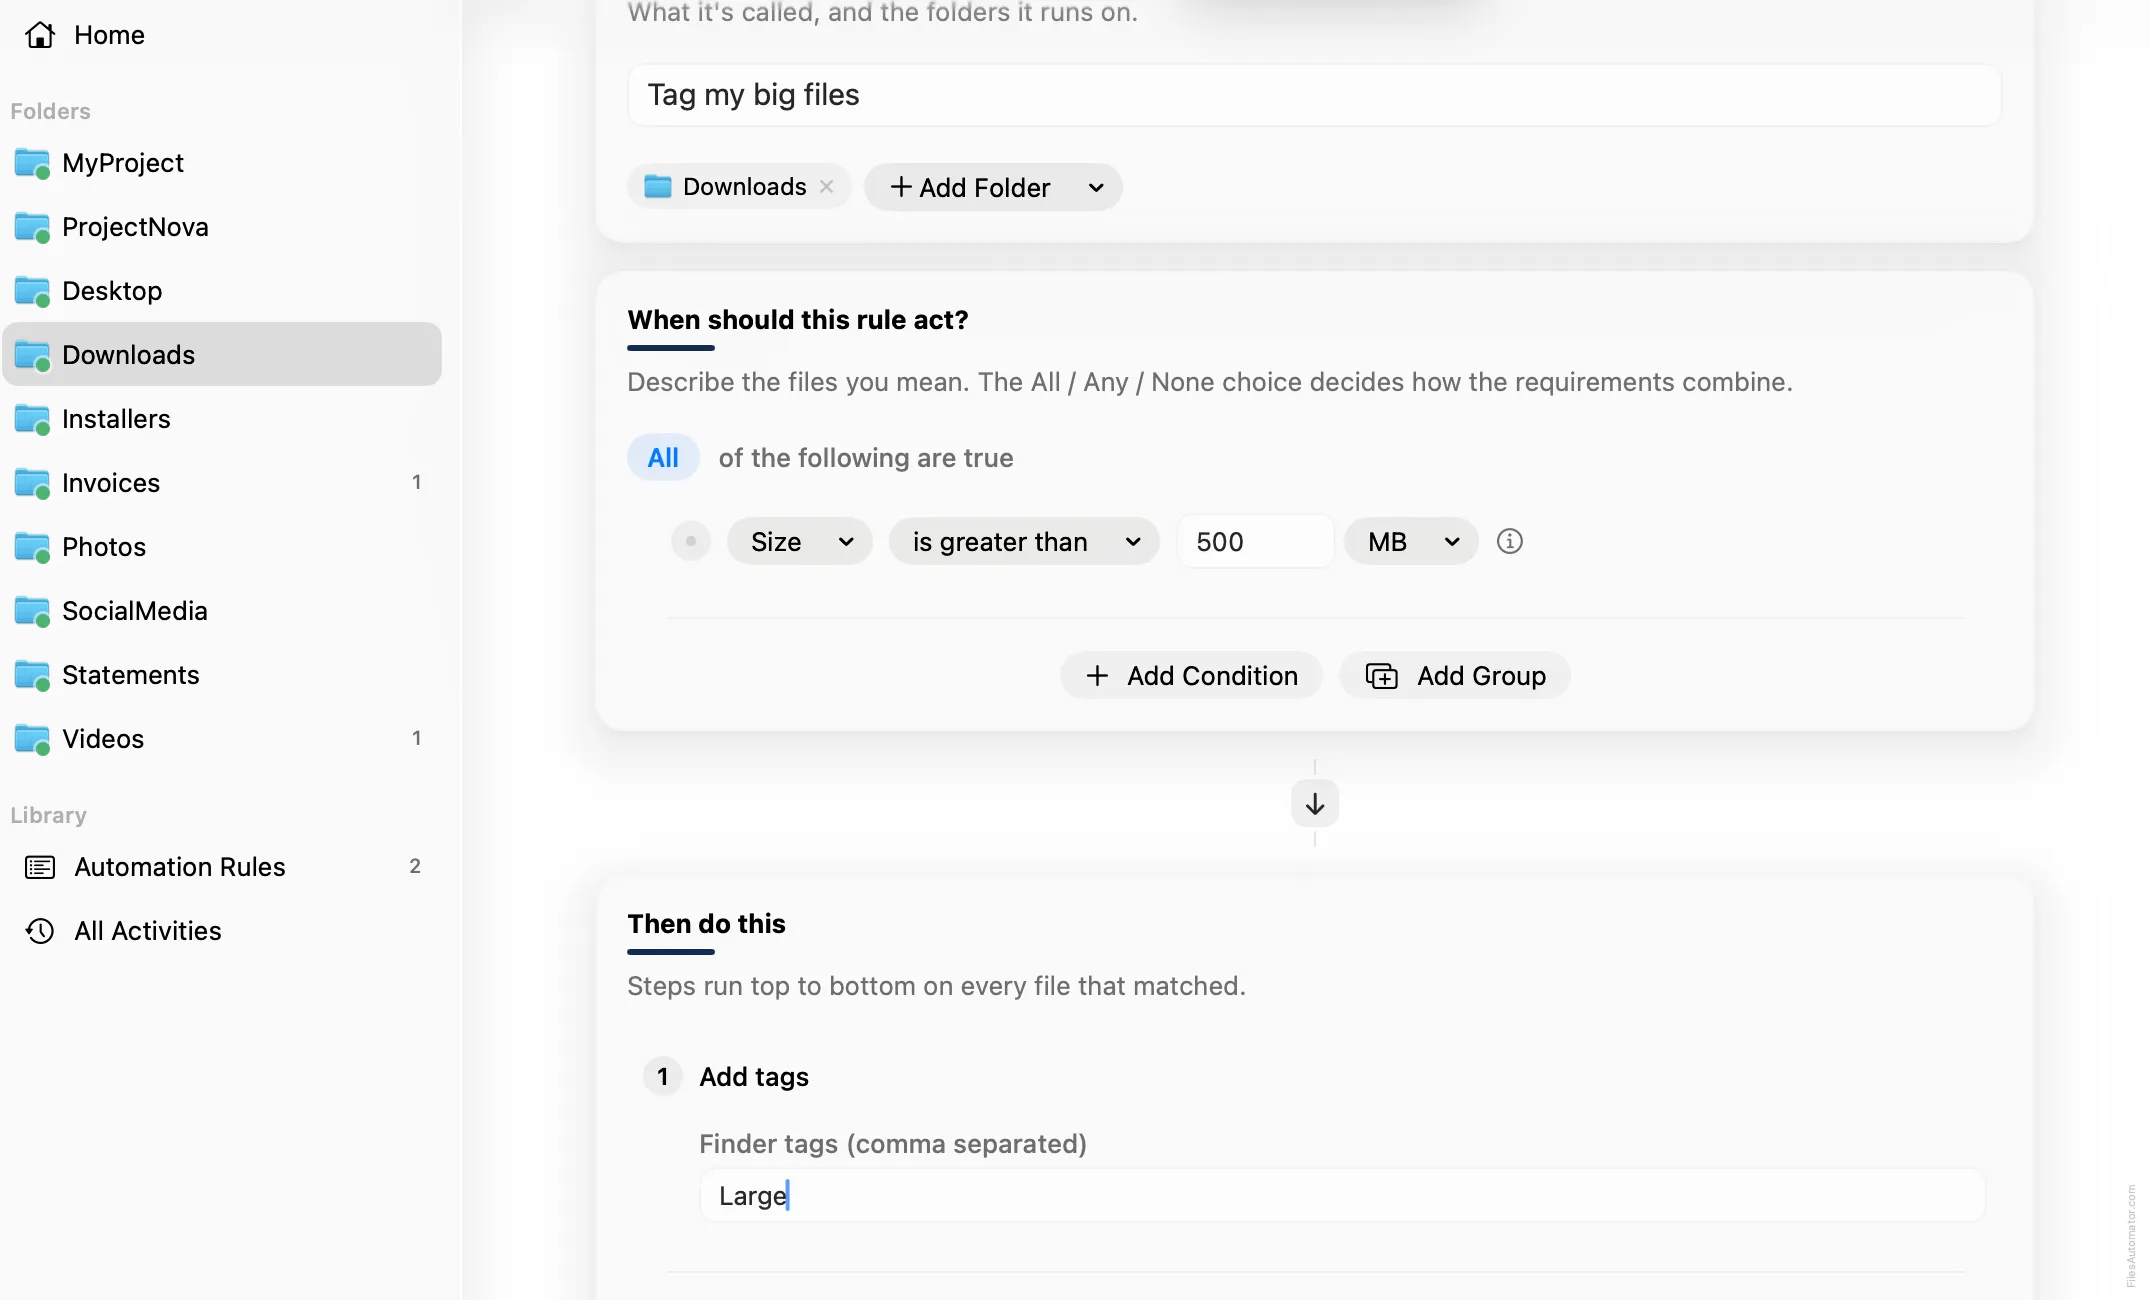
Choose Add Step, then Add tags. In “Finder tags (comma separated)”, type Large.
Turn it on
Select Create Automation Rule, then switch the rule on. Every large file that lands here from now on gets tagged automatically, ready to find whenever you need to free up space.
A faster way
The template gallery inside FilesAutomator already has this rule ready to install, named Tag big files.
Related rules
Get FilesAutomator
Everything in this guide happens inside FilesAutomator itself. Download it free from the Mac App Store to follow along, or to install this exact rule from the template gallery in one click instead of building it by hand.
Download on the App Store