How to sort screenshots automatically on Mac
Move screenshots into a Screenshots subfolder the moment they land
Beginner · About 2 minutes
In this guide
What this does
macOS names every screenshot “Screenshot” followed by the date and time, and drops it wherever your screenshot location is set, usually the Desktop. That’s fine for the first few, then it becomes a wall of near identical thumbnails sitting on top of everything else you’re working on.
This rule watches that folder and moves anything that looks like a screenshot into its own Screenshots subfolder as soon as it appears, so your Desktop stays the way you left it.
What you’ll build
A rule that matches files whose name begins with “Screenshot” and whose kind is an image, then sorts each match into a subfolder named Screenshots.
Open the rule editor
This walkthrough happens inside FilesAutomator itself, so install it from the Mac App Store first if you have not already, then open it. In its toolbar, choose Add, then New Automation Rule.
Name the rule and choose a folder
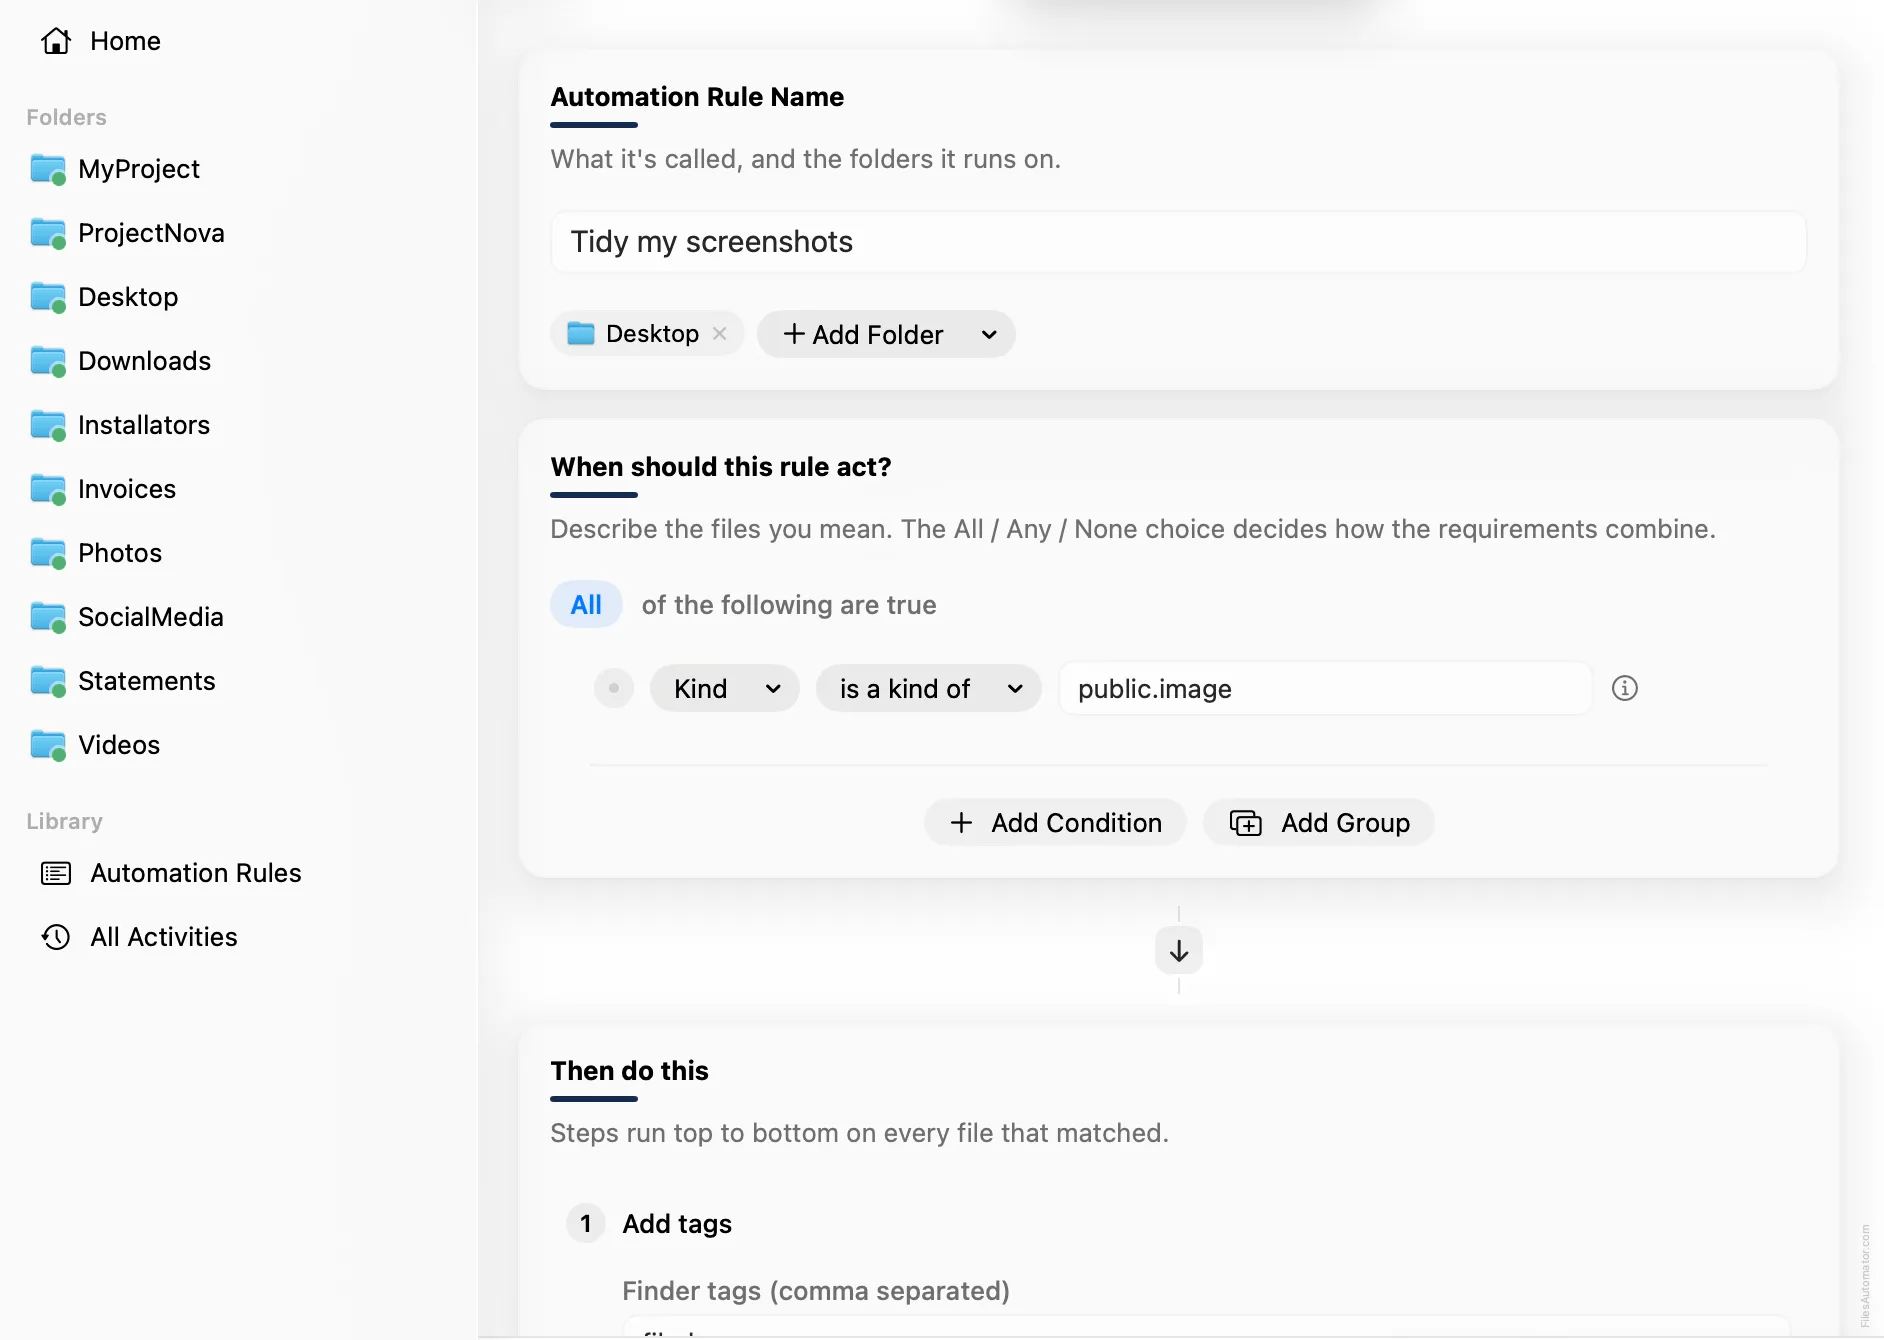
In the Automation Rule Name card (“What it’s called, and the folders it runs on”), give the rule a name like “Tidy my screenshots”, then use Add Folder to choose the folder where your screenshots land. If you’re not sure, macOS saves screenshots to the Desktop by default.
Build the condition
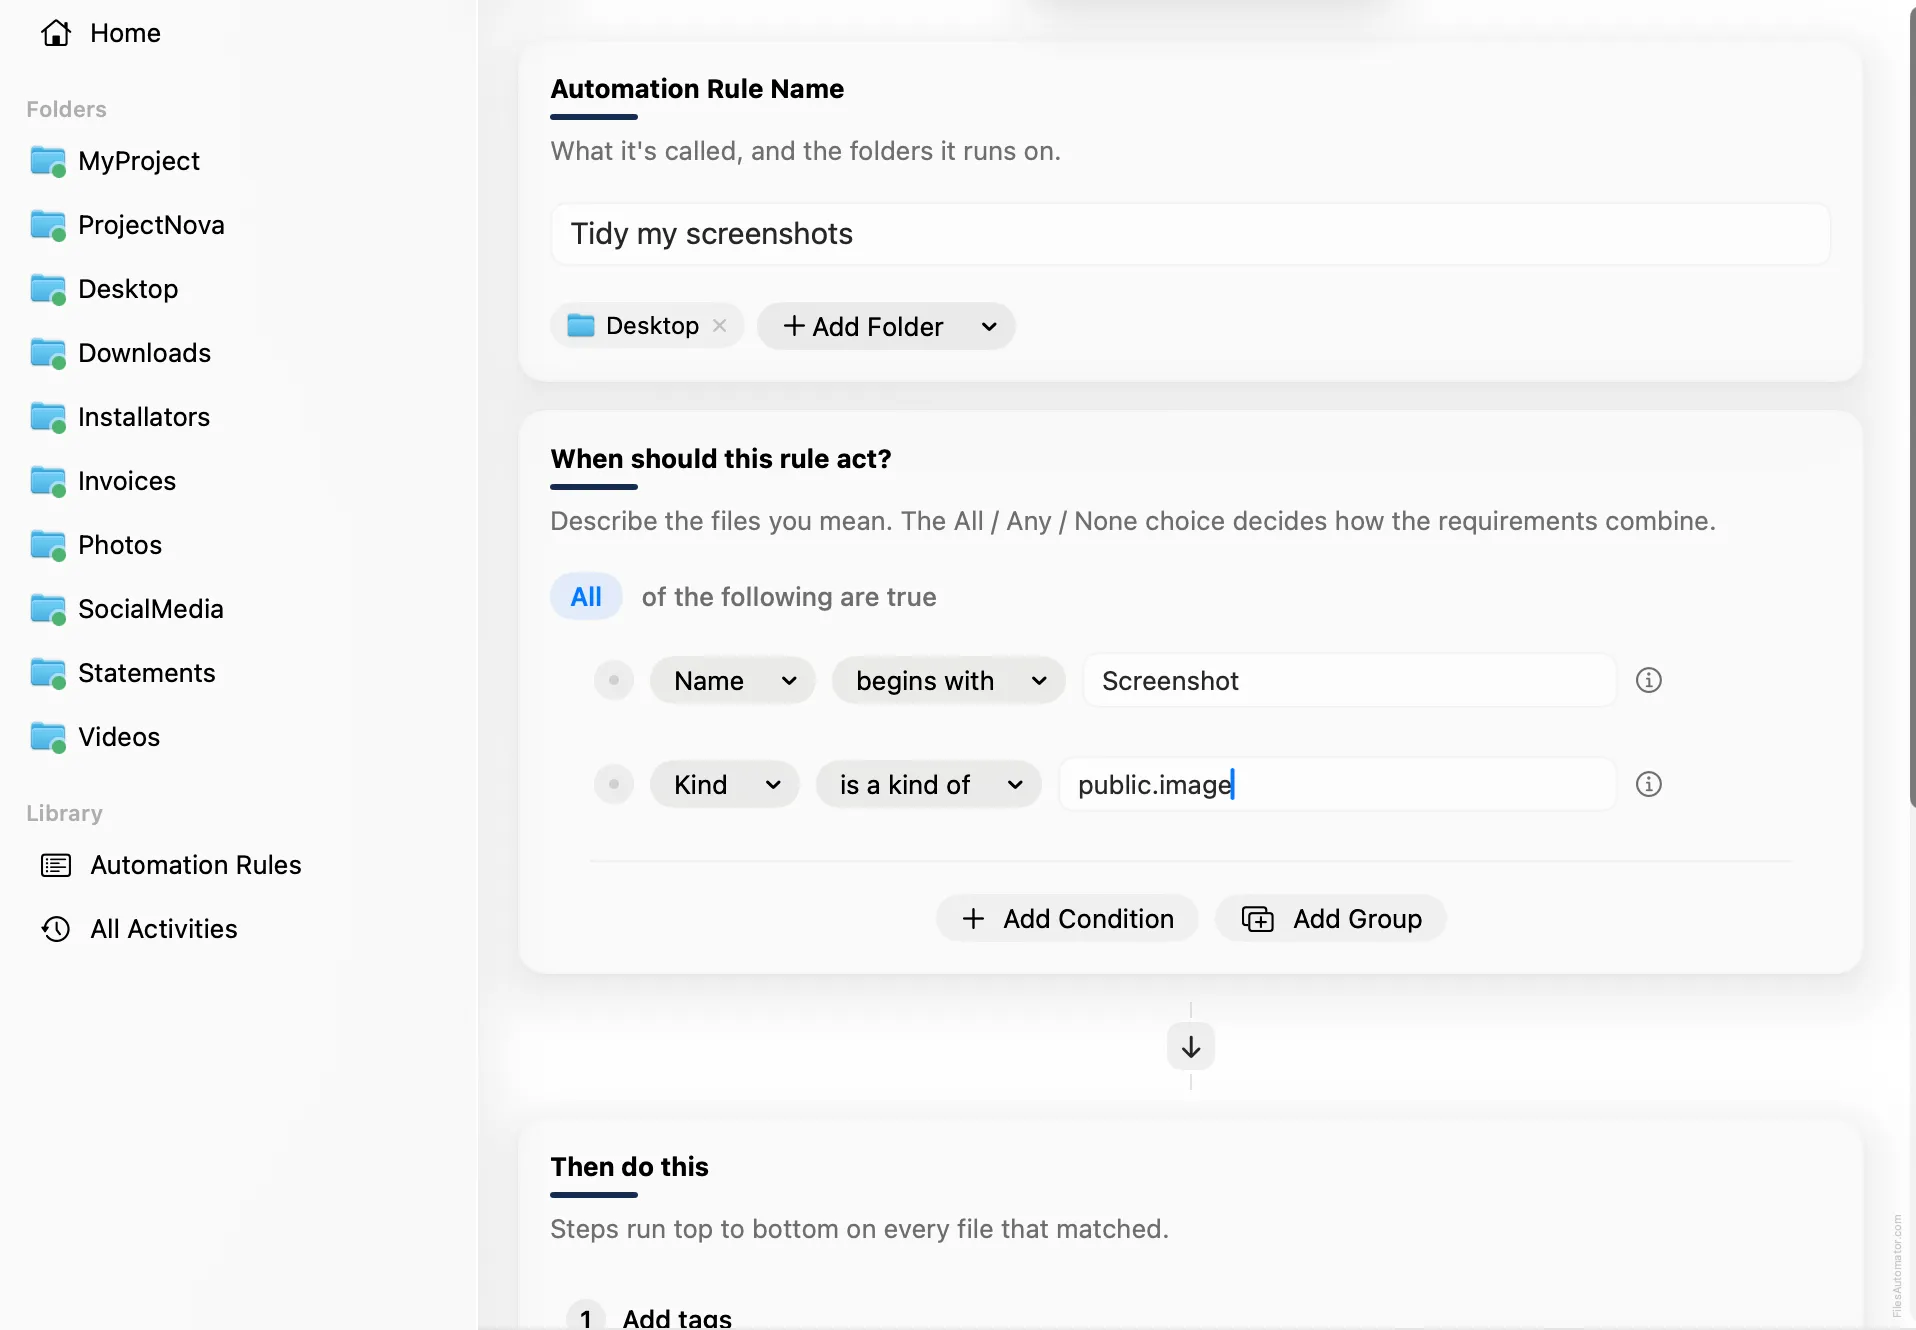
Under “When should this rule act?”, leave the group set to “All of the following are true”, since a real screenshot needs to match both checks below, not just one.
Add a condition: Name begins with Screenshot.
Add a second condition: Kind is a kind of public.image, which matches every image format.
Together these catch macOS screenshots specifically, rather than every image in the folder.
Add the action steps
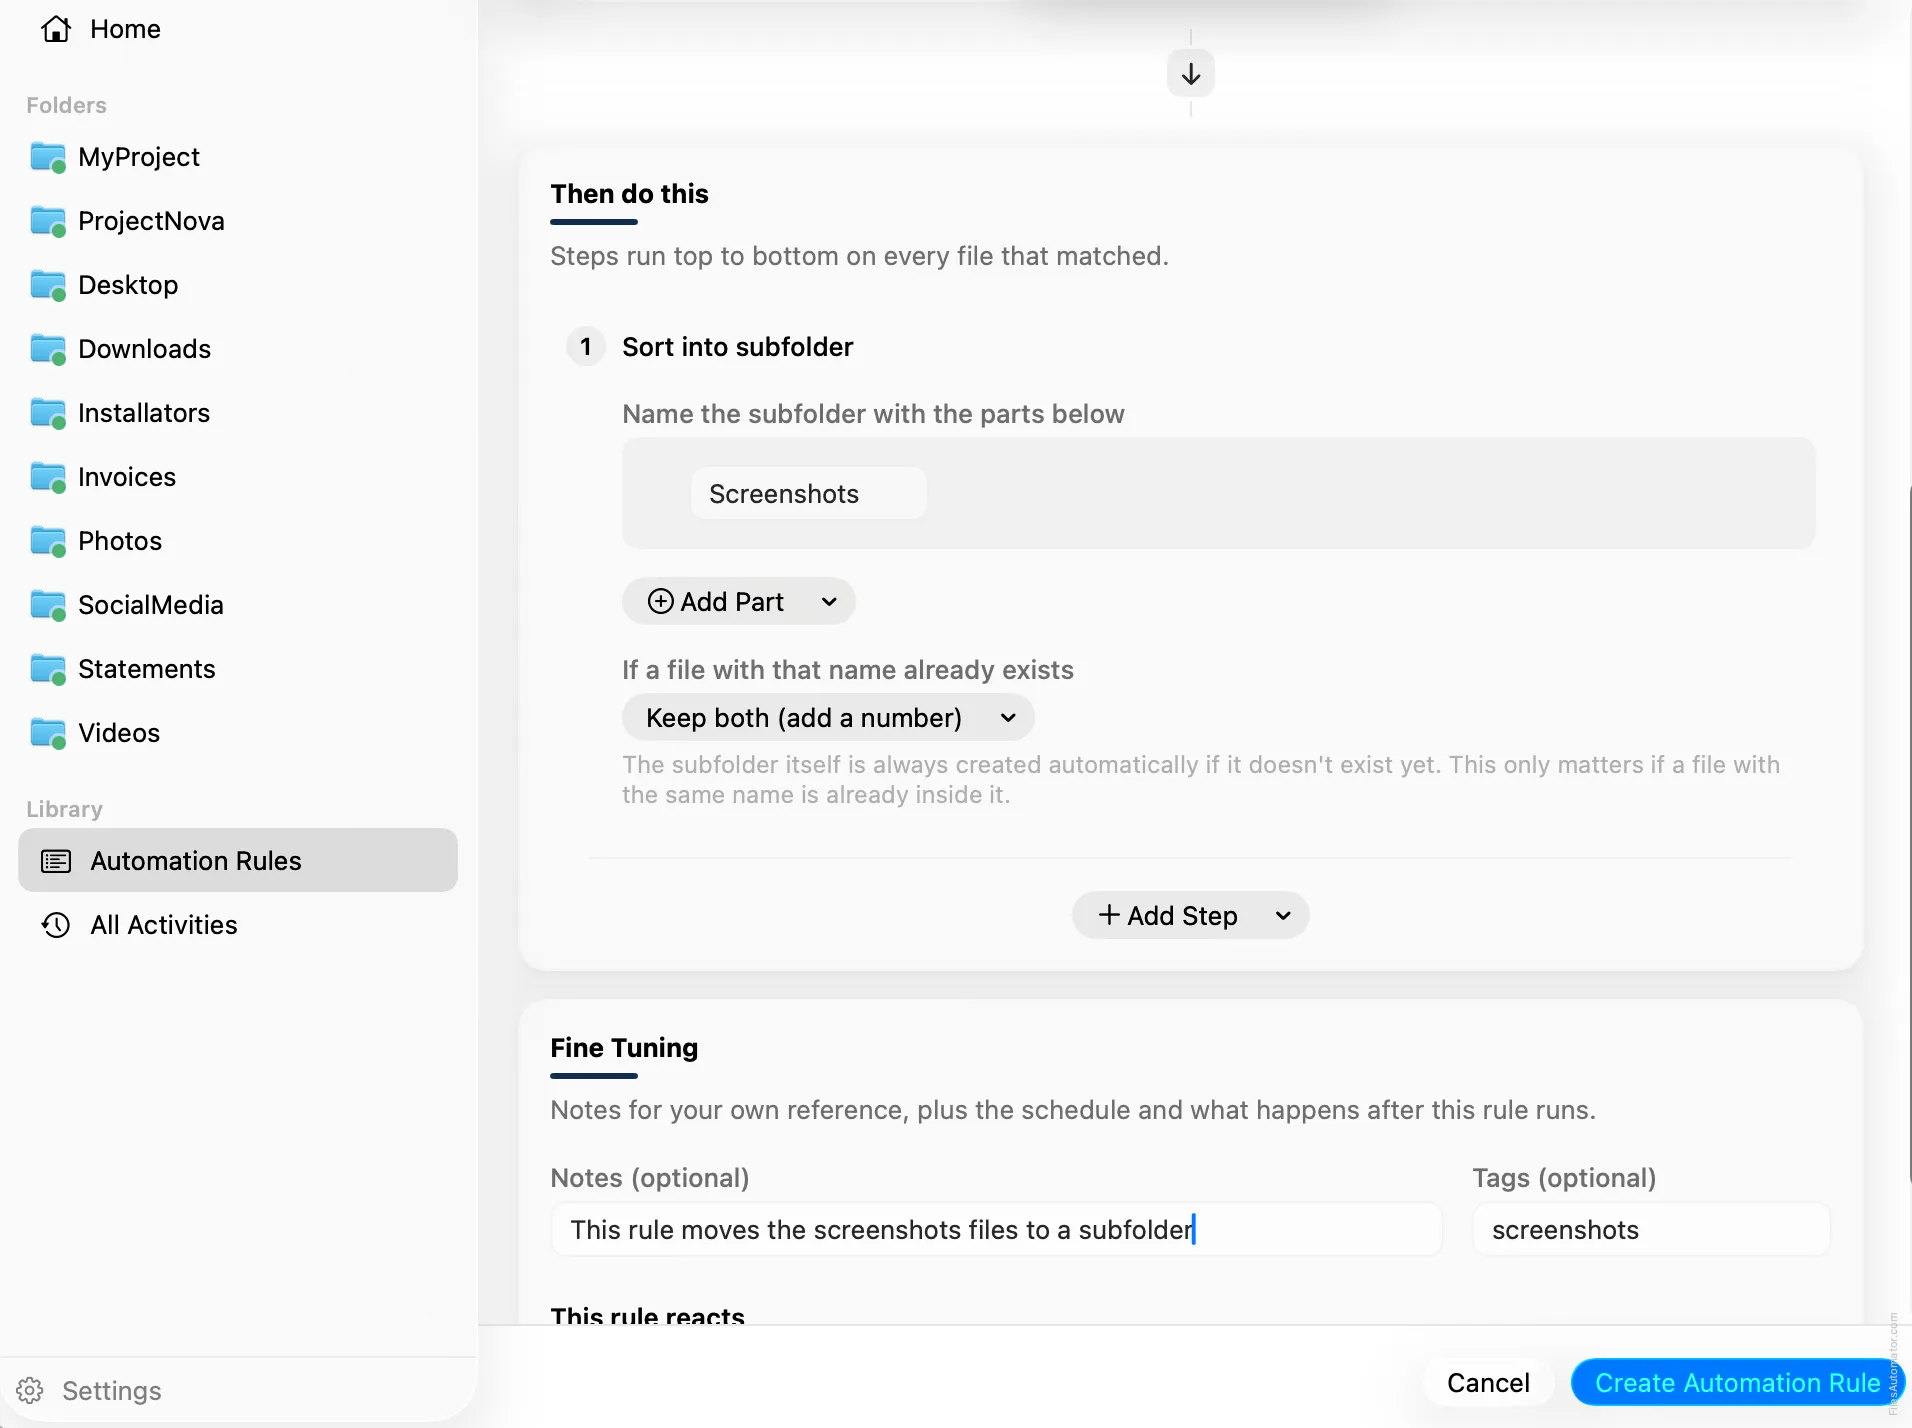
Step 1: Sort into subfolder
Under “Then do this”, choose Add Step, then Sort into folder. In the field labeled “Name the subfolder with the parts below”, use Add Part and choose Text, then type Screenshots. That’s the whole pattern, a fixed subfolder name with nothing else added to it.
Leave “If a file with that name already exists” on its default, Keep both (add a number), so two screenshots taken moments apart never overwrite each other.
Turn it on
Select Create Automation Rule to save it. New rules start turned off, so open the folder’s rule list and switch this one on when you’re ready. From then on, every screenshot you take is moved into the Screenshots subfolder automatically.
A faster way
Built it by hand above? The template gallery inside FilesAutomator already has this exact rule ready to install with one click, named Tidy screenshots. The manual walkthrough is here so you know exactly what it does and can adapt it, but the template is the quickest way to get it running.
Related rules
Get FilesAutomator
Everything in this guide happens inside FilesAutomator itself. Download it free from the Mac App Store to follow along, or to install this exact rule from the template gallery in one click instead of building it by hand.
Download on the App Store