How to sort photos by year and month on Mac
Images filed into nested year and month subfolders, by capture date
Beginner · About 3 minutes
In this guide
What this does
A single year folder still gets crowded if you take a lot of photos. This rule goes one level further than sorting by year alone: it files each photo into a year folder, then a month folder inside that, so a folder never holds more than one month’s worth of photos at a time. Like the year only version, it reads the capture date from the photo itself.
What you’ll build
A rule that matches any image, then sorts it into nested Year then Month subfolders based on capture date.
Open the rule editor
This walkthrough happens inside FilesAutomator itself, so install it from the Mac App Store first if you have not already, then open it. In its toolbar, choose Add, then New Automation Rule.
Name the rule and choose a folder
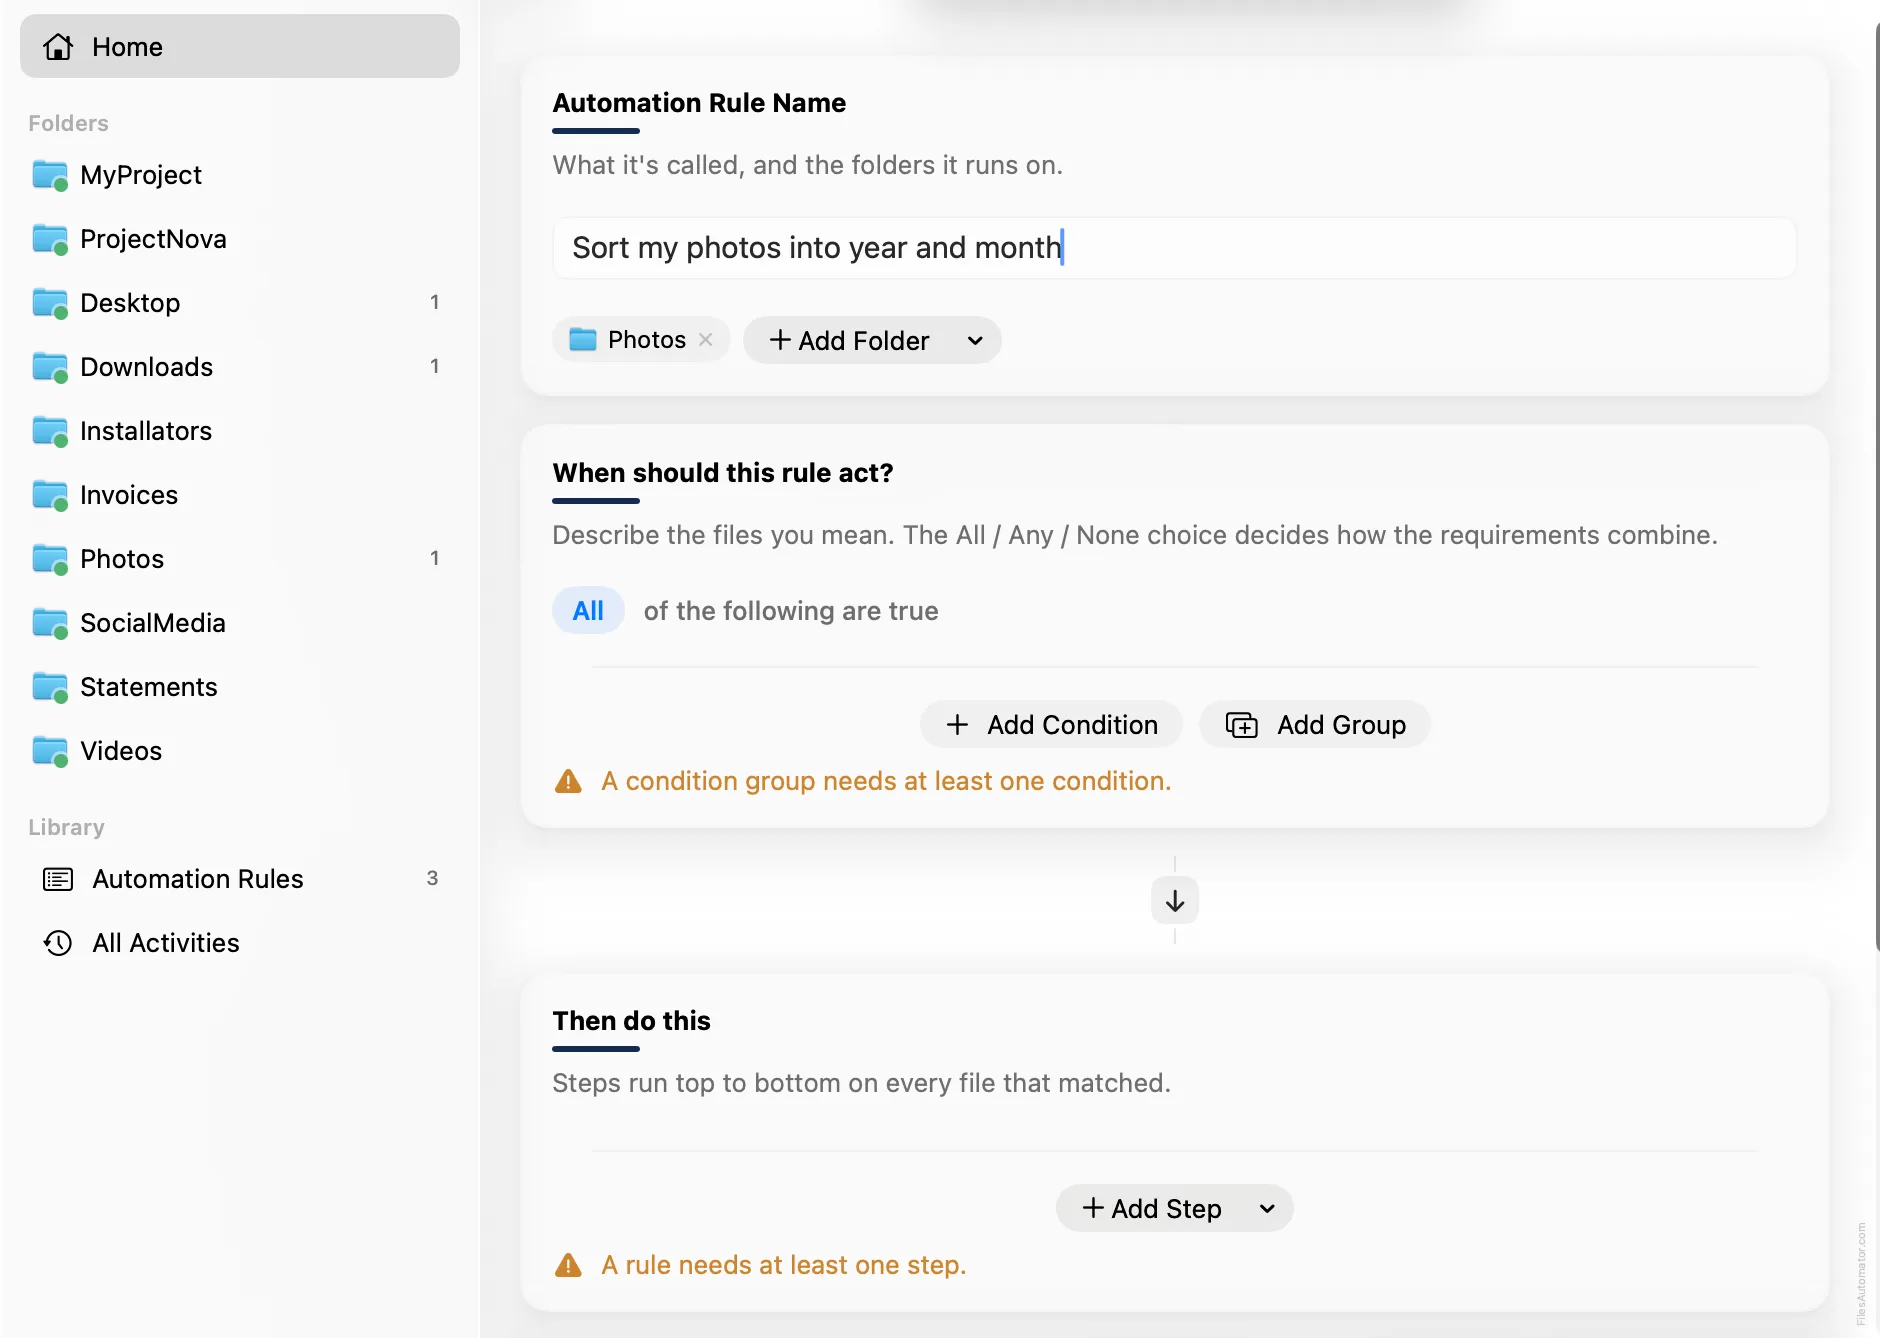
Name it something like “Sort my photos into year and month” and use Add Folder to choose the folder your photos land in.
Build the condition
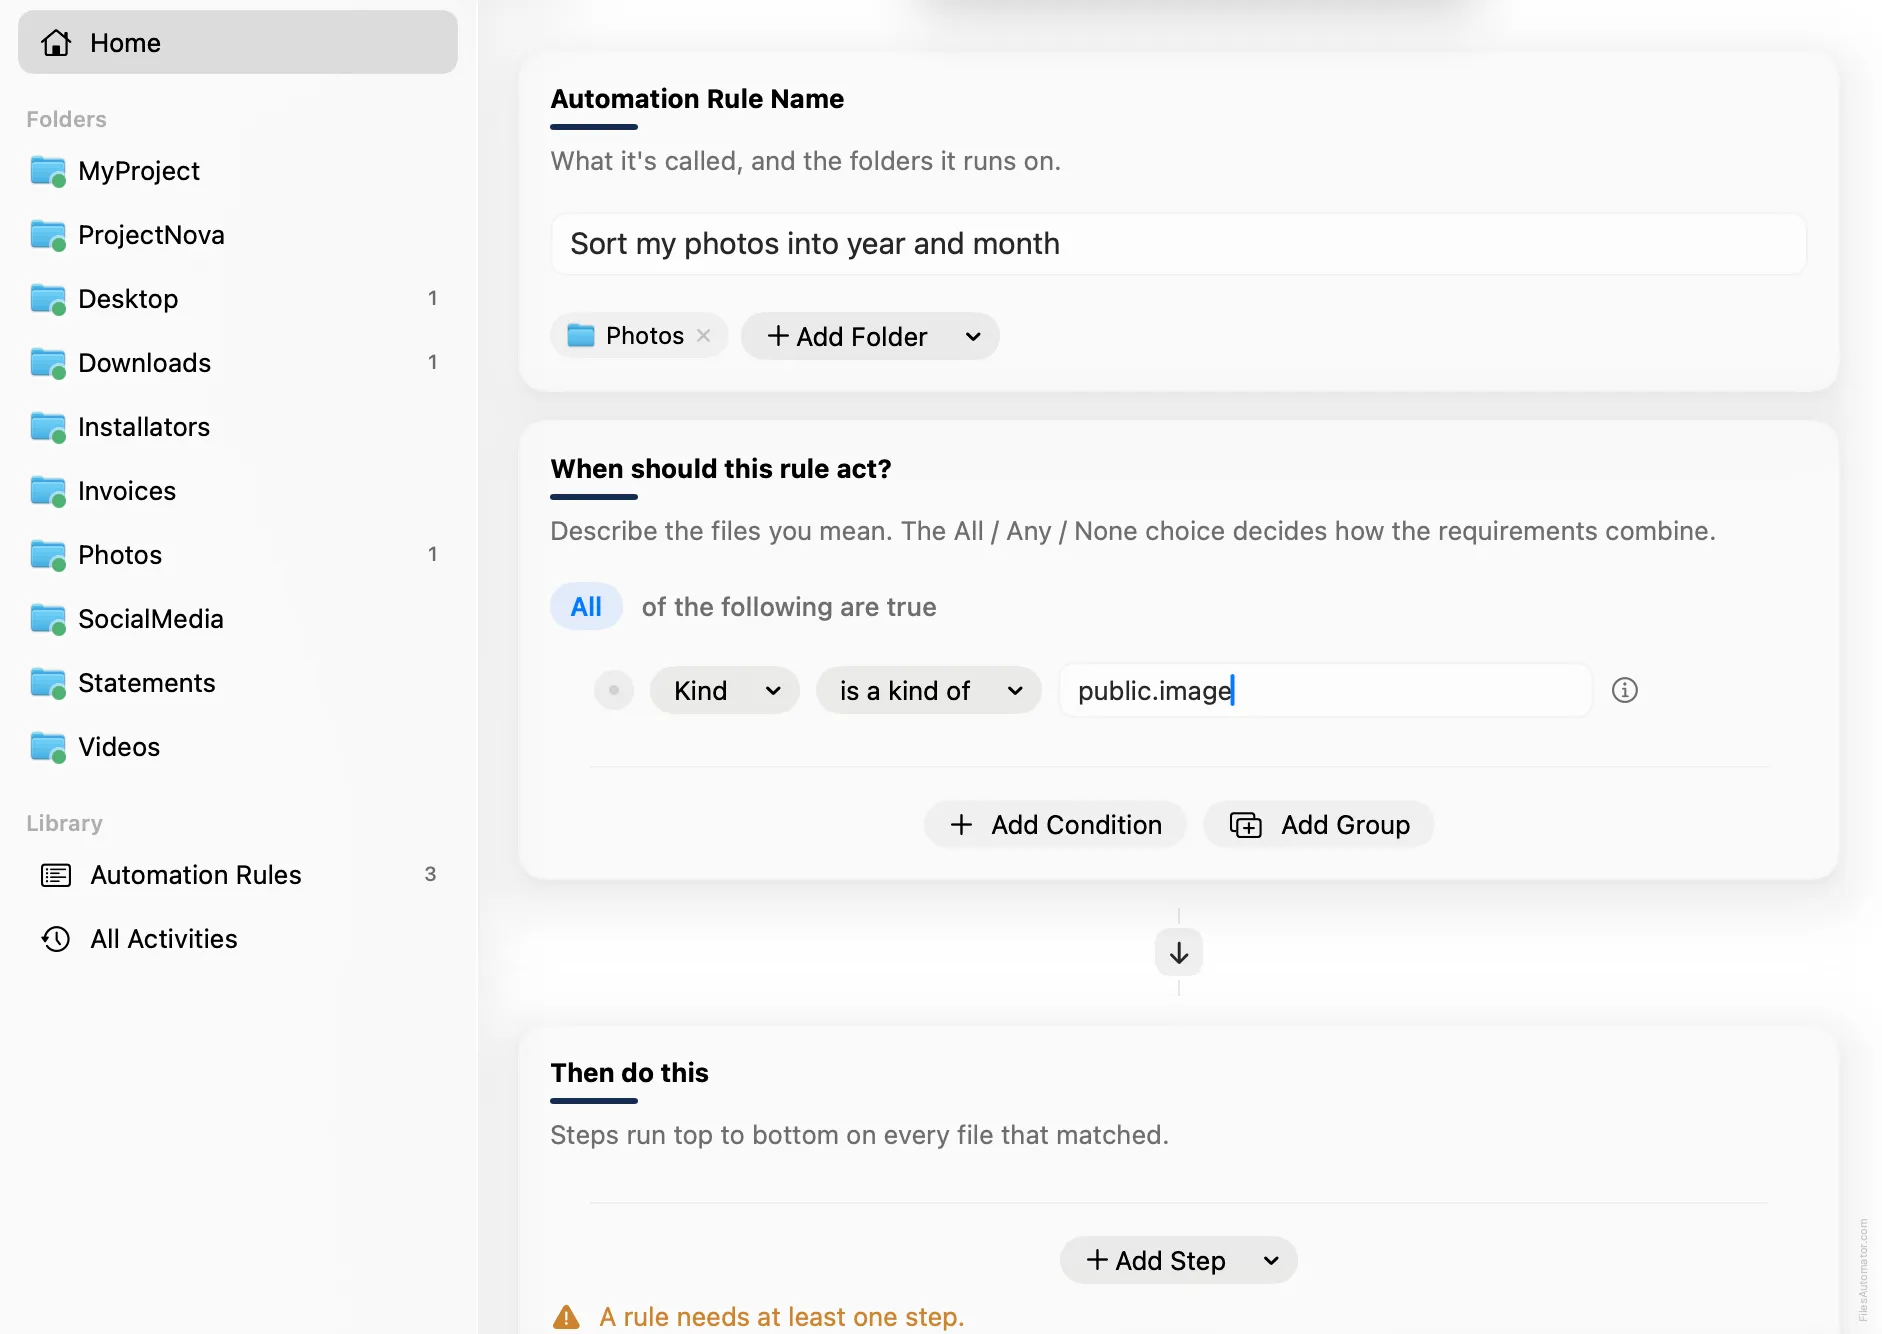
Add a single condition: Kind is a kind of public.image, which matches every image format.
Add the action steps
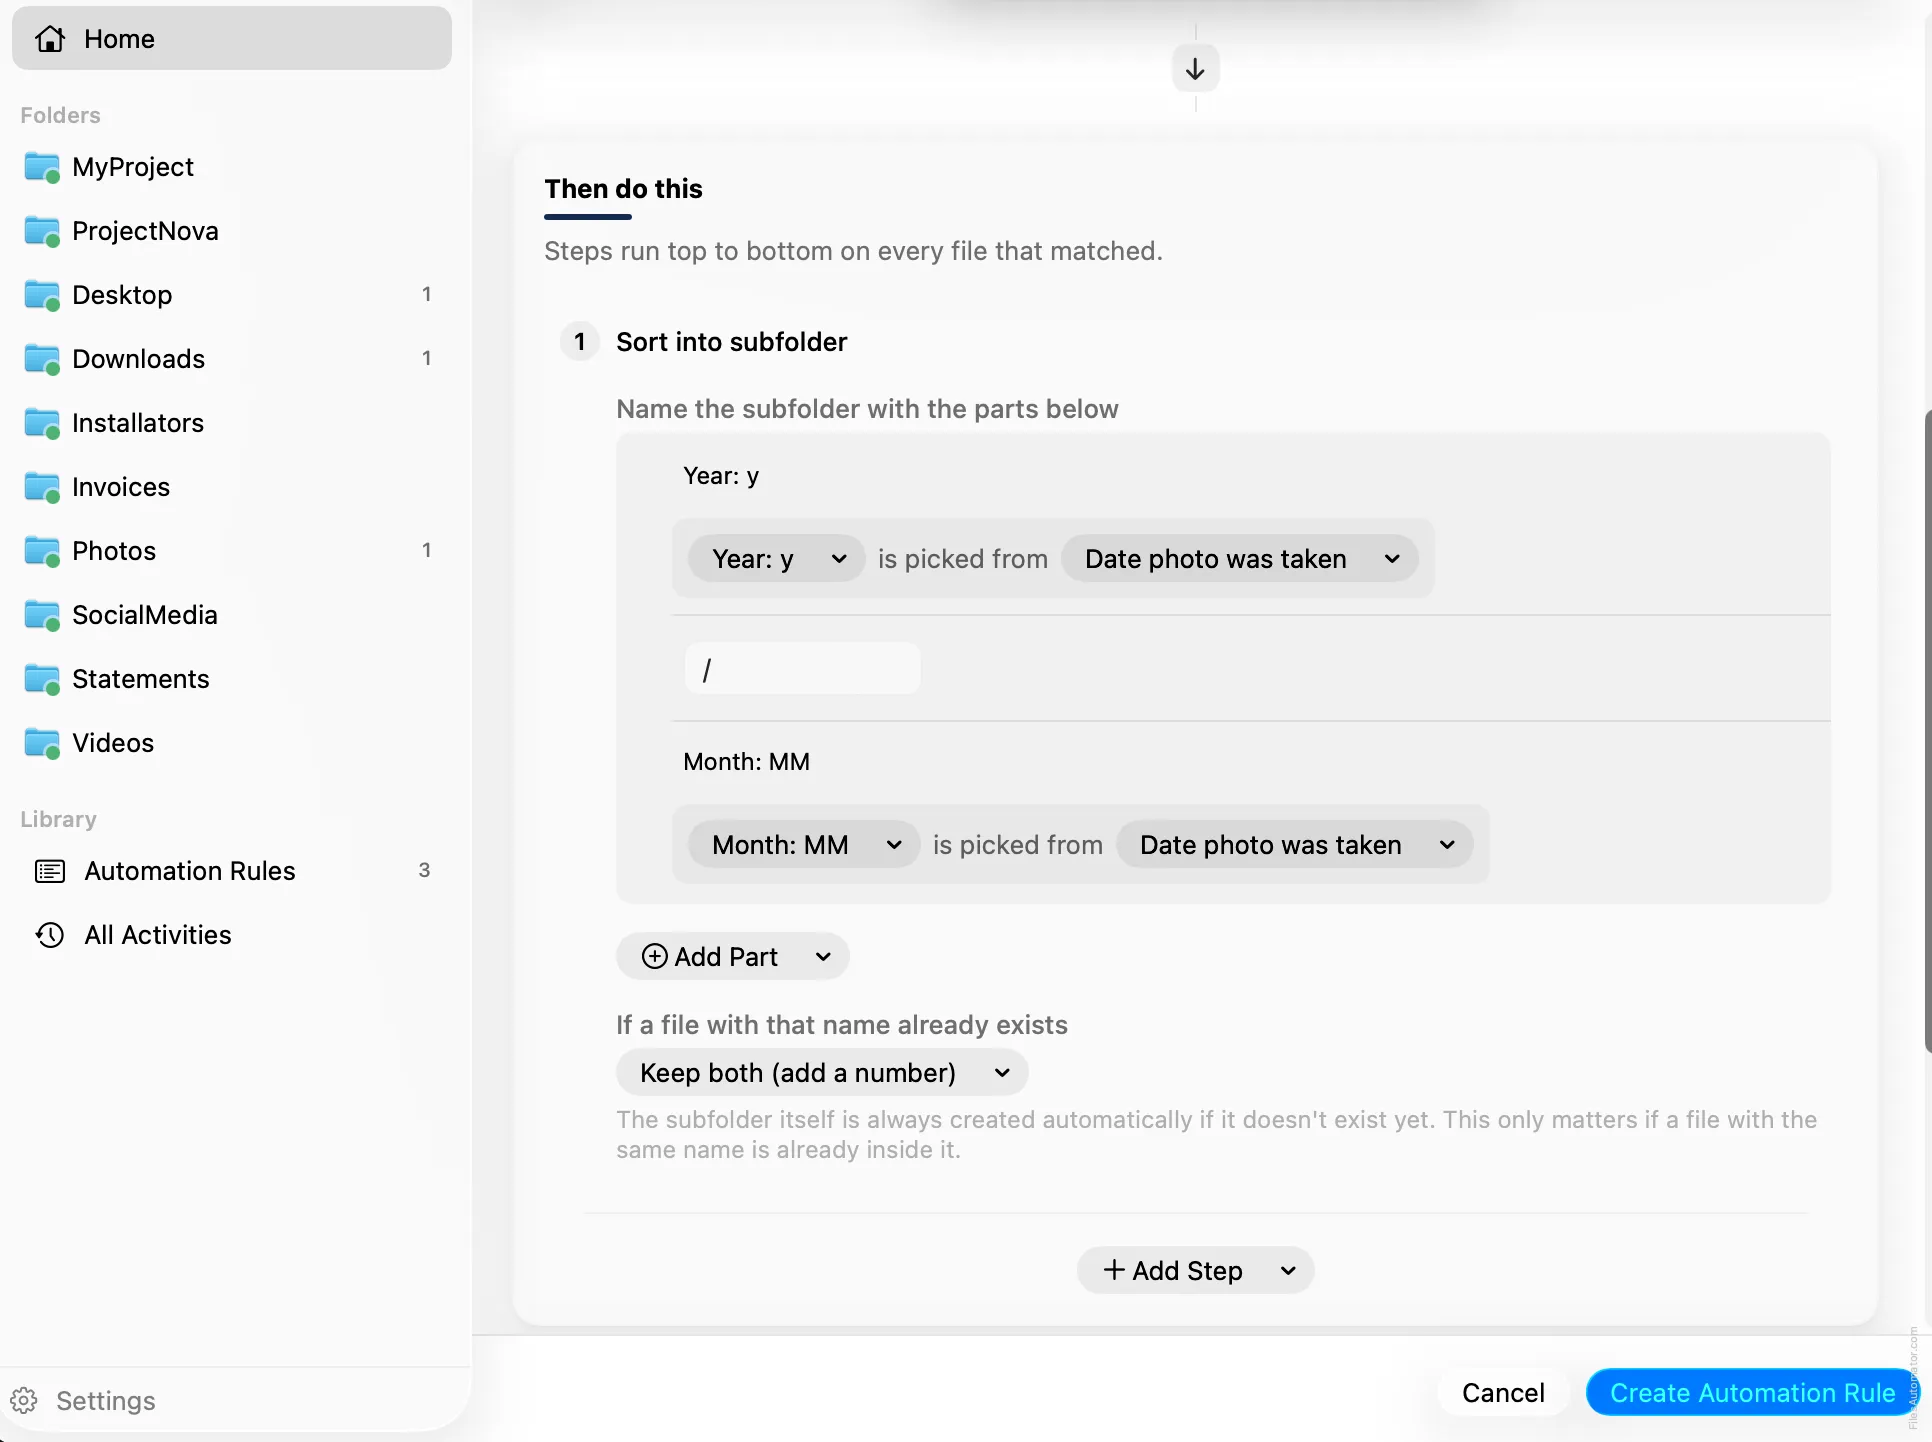
Step 1: Sort into subfolder
Choose Add Step, then Sort into folder. Build the pattern in “Name the subfolder with the parts below” in three pieces:
- Add Part, then Date, then Year: y. Click the new chip and change its source to Date photo was taken.
- Add Part, then Subfolder separator ( / ), to start a nested level.
- Add Part, then Date, then Month: MM. Change this chip’s source to Date photo was taken too.
The result reads as two chips joined by a separator, filing into something like 2026 then 07 inside it.
Turn it on
Select Create Automation Rule, then switch the rule on from the folder’s rule list. Every photo that lands here now files itself into its year and month automatically.
A faster way
The template gallery inside FilesAutomator already has this rule ready to install, named Sort photos into year and month.
Related rules
Get FilesAutomator
Everything in this guide happens inside FilesAutomator itself. Download it free from the Mac App Store to follow along, or to install this exact rule from the template gallery in one click instead of building it by hand.
Download on the App Store