How to convert HEIC to PNG automatically on Mac
iPhone photos become universally openable PNGs, undoable
Beginner · About 1 minute
In this guide
What this does
This is the PNG sibling of the HEIC to JPEG rule, for when you’d rather have a lossless copy instead of a compressed one, useful if the image is heading somewhere that expects PNG, like a design tool or a website that wants transparency support. It converts every HEIC file to PNG the moment it lands, keeping the original HEIC alongside it.
What you’ll build
A rule that matches files ending in .heic, then converts each one to PNG while keeping the original untouched.
Open the rule editor
This walkthrough happens inside FilesAutomator itself, so install it from the Mac App Store first if you have not already, then open it. In its toolbar, choose Add, then New Automation Rule.
Name the rule and choose a folder
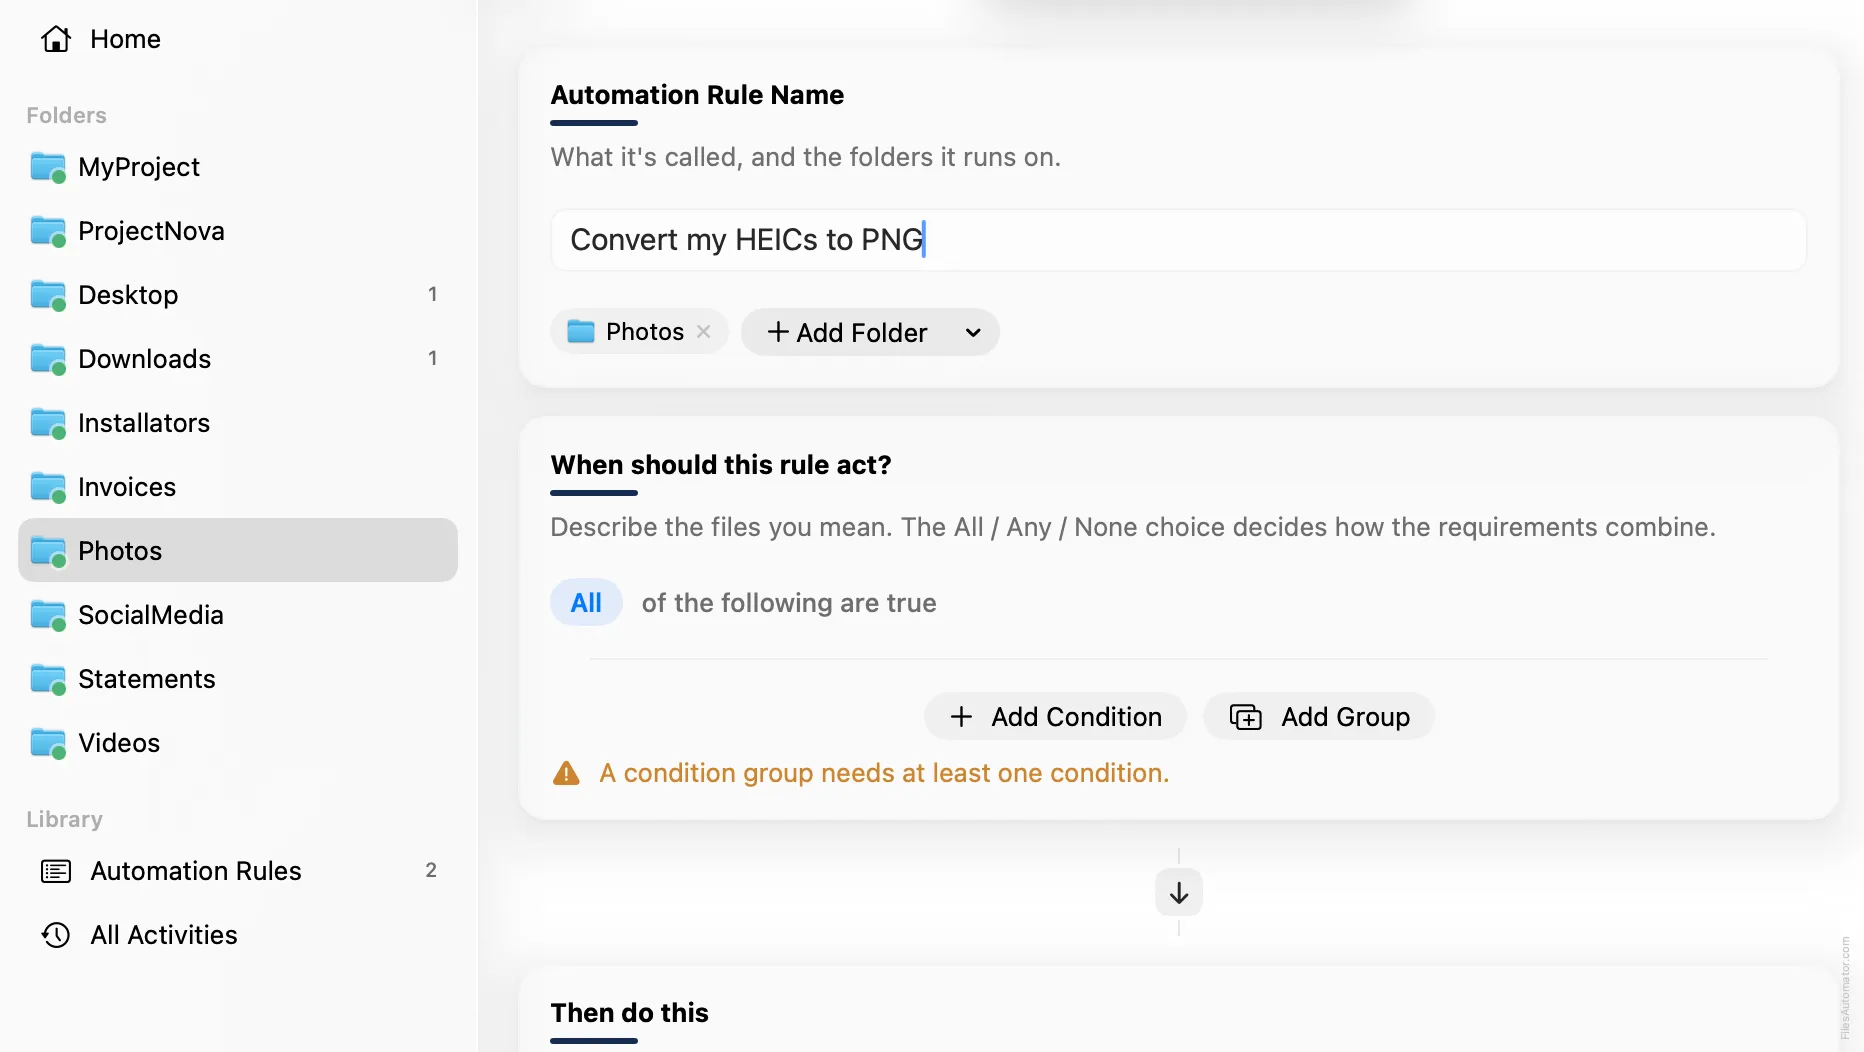
Name it something like “Convert my HEICs to PNG” and use Add Folder to choose the folder your photos land in.
Build the condition
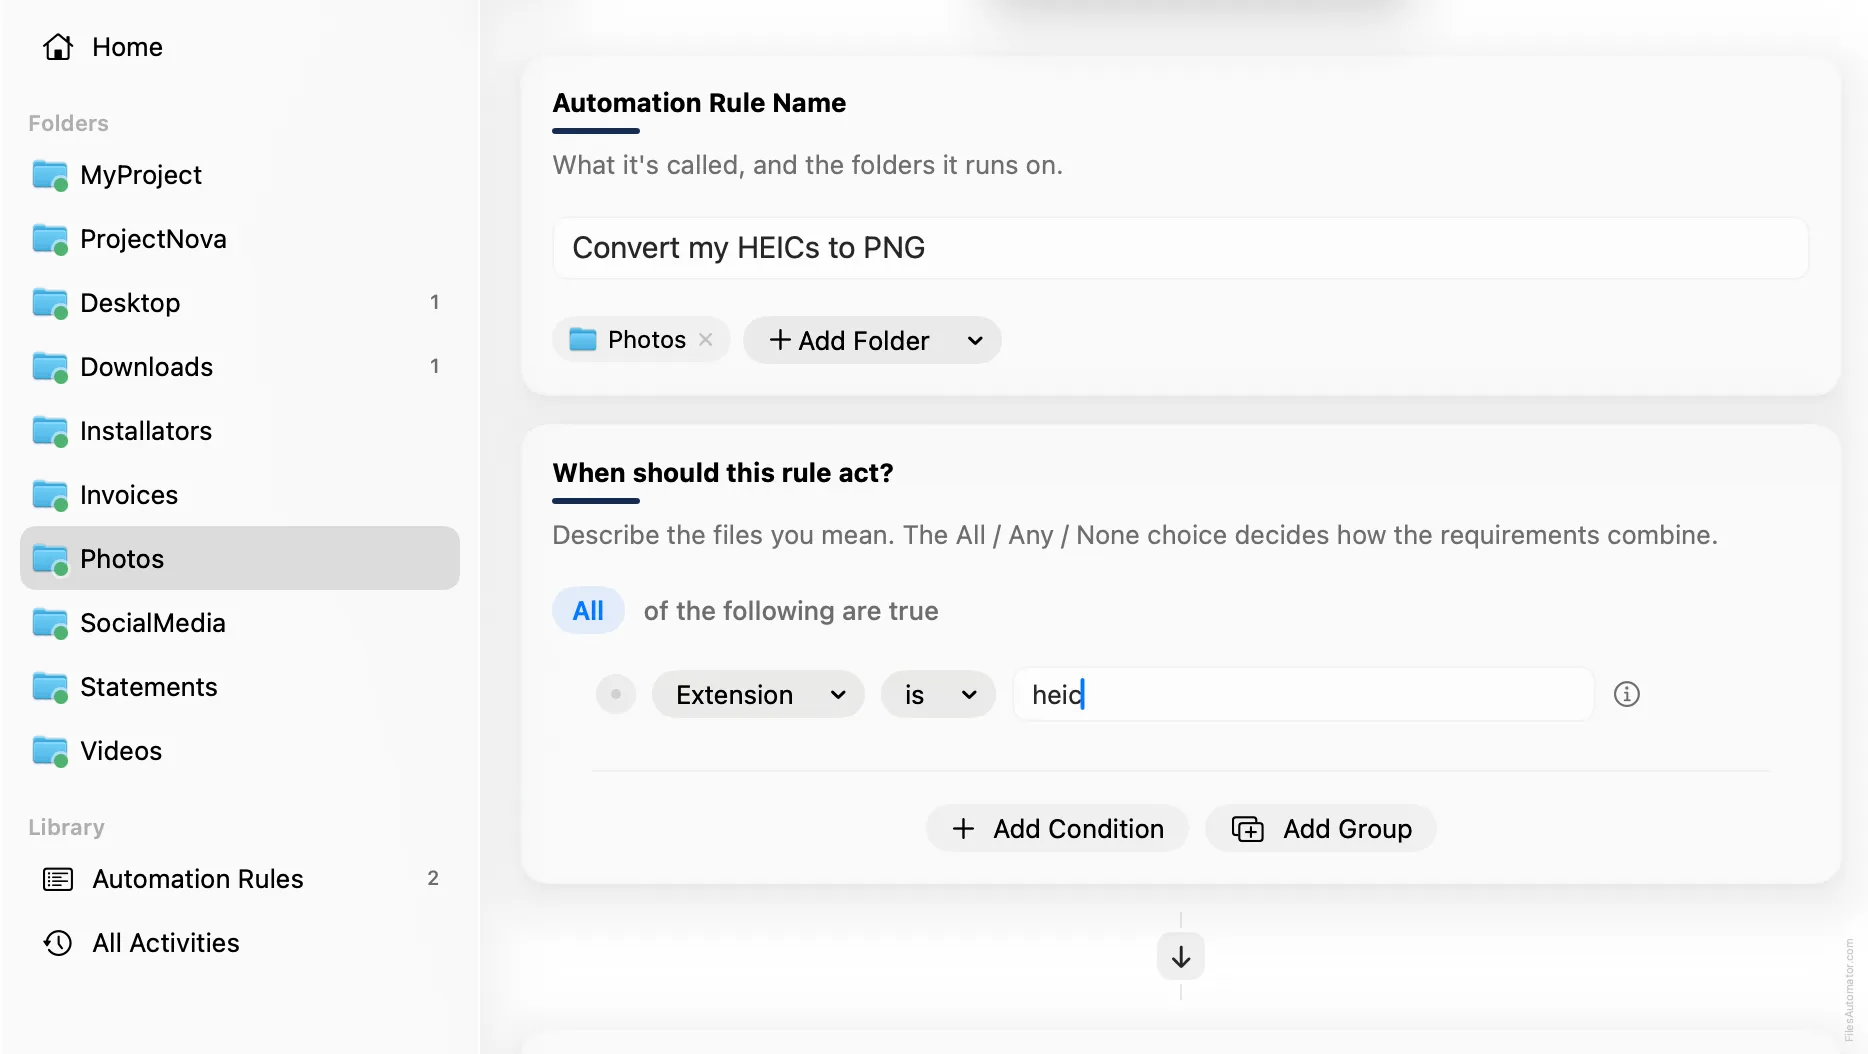
Add a single condition: Extension is heic.
Add the action steps
Step 1: Convert image
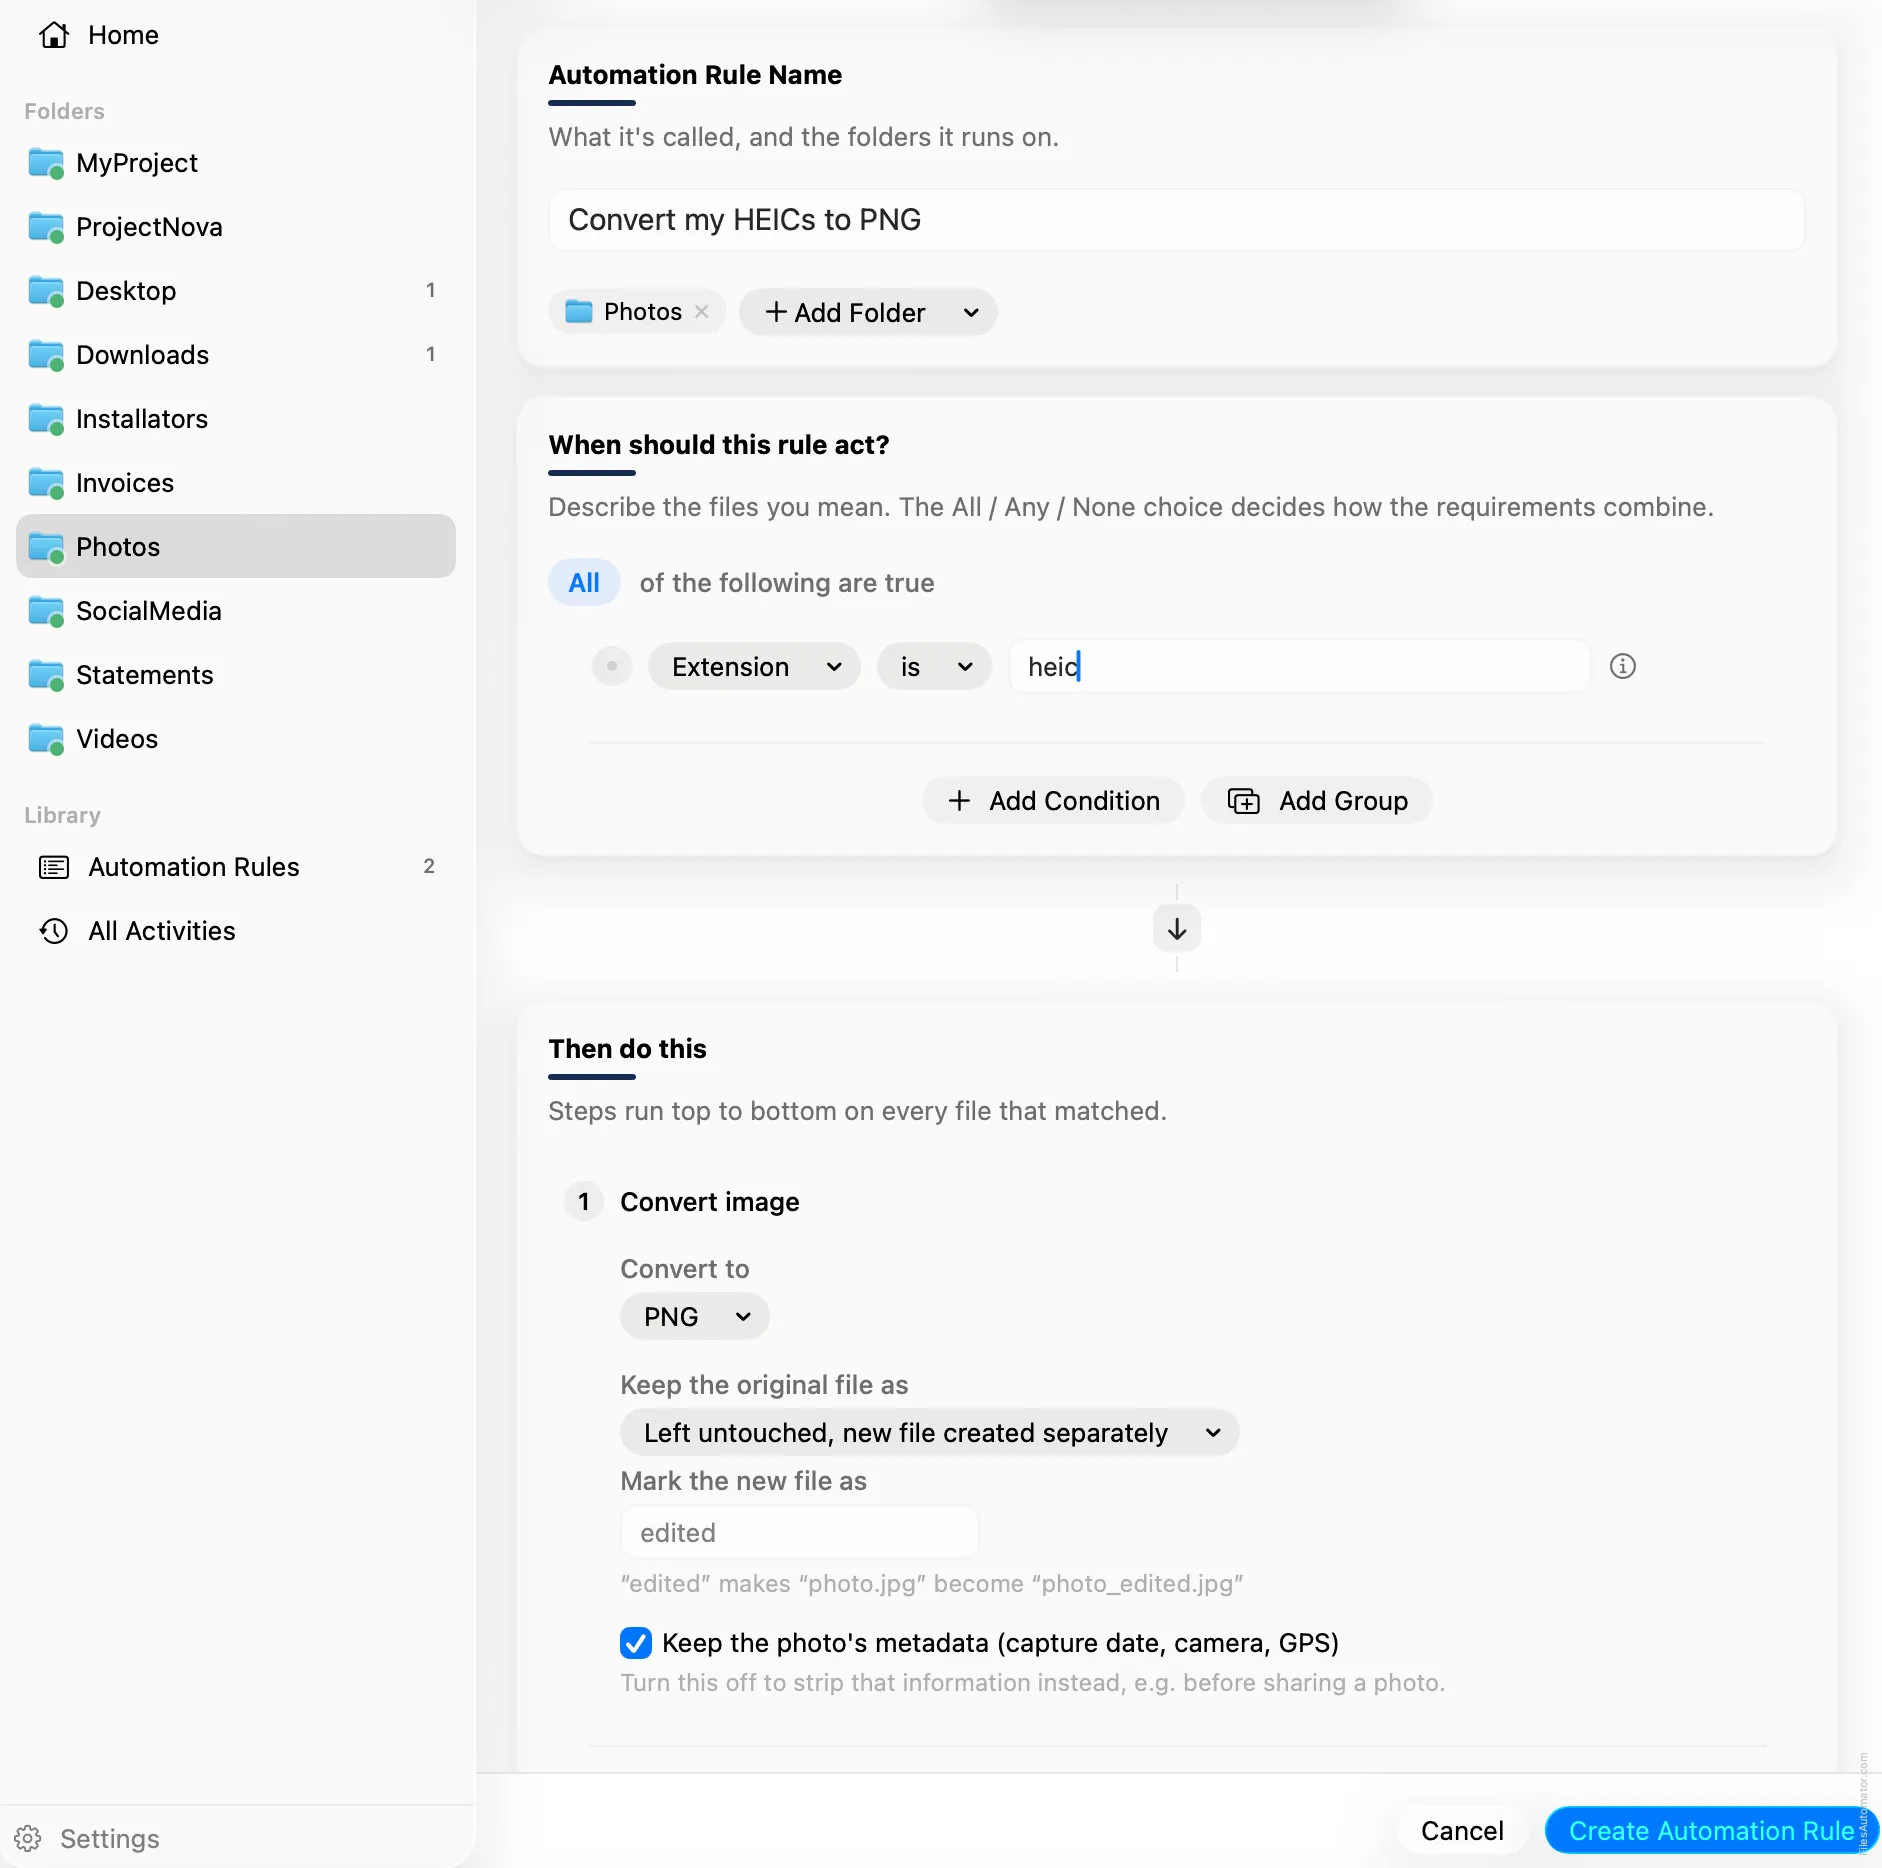
Choose Add Step, then Convert image. Set “Convert to” to PNG. The Quality slider only affects formats that compress, like JPEG, so it has nothing to do here, PNG is lossless either way.
Set “Keep the original file as” to Left untouched, new file created separately, so the HEIC stays exactly where it was and the PNG appears next to it.
Turn it on
Select Create Automation Rule, then switch the rule on. Every conversion it makes is undoable from Activity if you ever change your mind.
A faster way
The template gallery inside FilesAutomator already has this rule ready to install, named Convert HEIC to PNG.
Related rules
Get FilesAutomator
Everything in this guide happens inside FilesAutomator itself. Download it free from the Mac App Store to follow along, or to install this exact rule from the template gallery in one click instead of building it by hand.
Download on the App Store