How to automatically stamp processed PDFs on Mac
Adds a Filed stamp to every PDF that lands here, so you can tell it has already been processed
Beginner · About 2 minutes
In this guide
What this does
When paperwork moves through more than one folder or more than one rule, it helps to have a visual marker showing a document has already been dealt with. This rule stamps the word “Filed” onto every PDF that lands in the folder, so a quick glance at the page tells you it’s already been processed, without opening it.
What you’ll build
A rule that matches every PDF, then stamps “Filed” onto it.
Open the rule editor
This walkthrough happens inside FilesAutomator itself, so install it from the Mac App Store first if you have not already, then open it. In its toolbar, choose Add, then New Automation Rule.
Name the rule and choose a folder
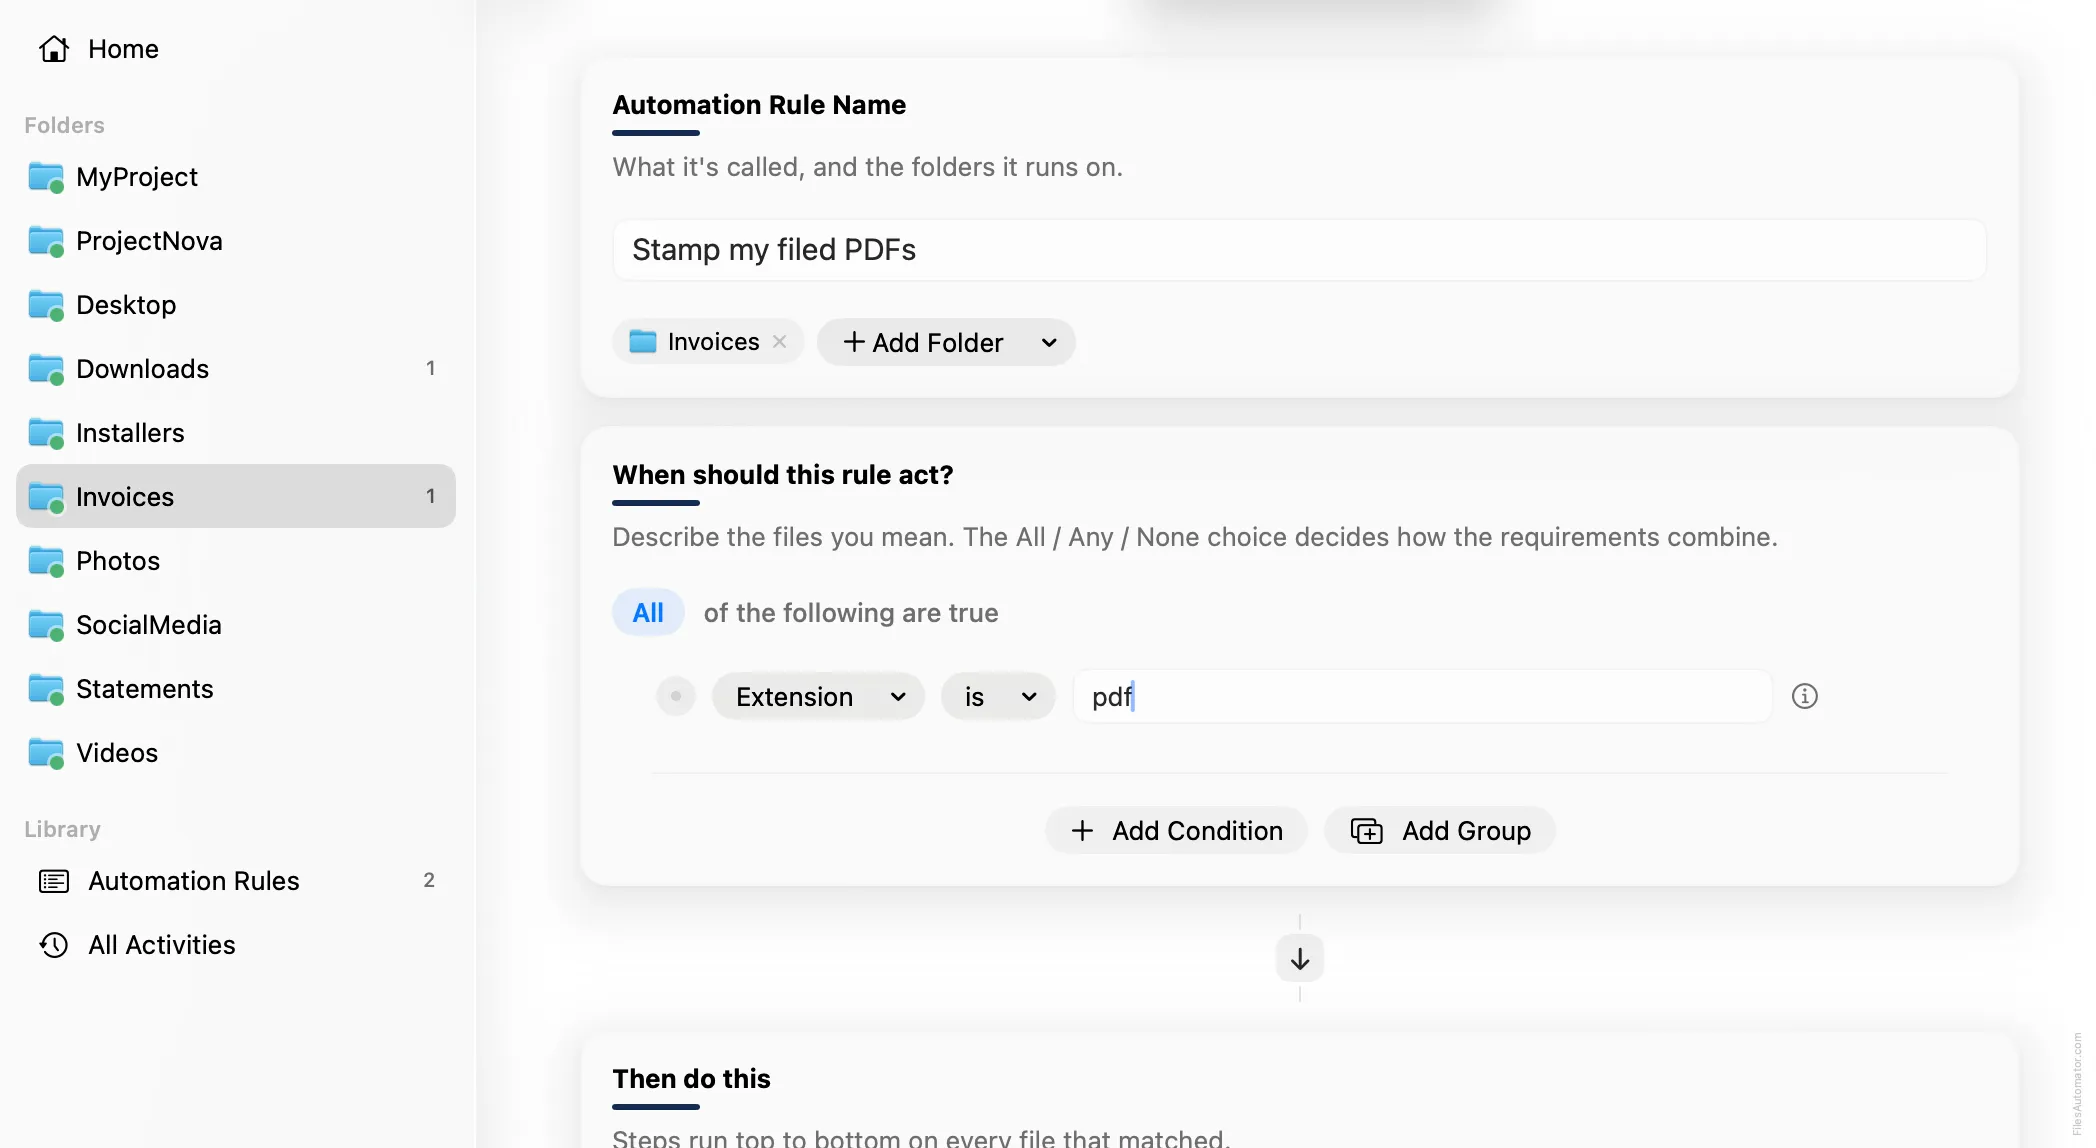
Name it something like “Stamp my filed PDFs” and use Add Folder to choose the folder you want this applied to.
Build the condition
Add a single condition: Extension is pdf.
Add the action steps
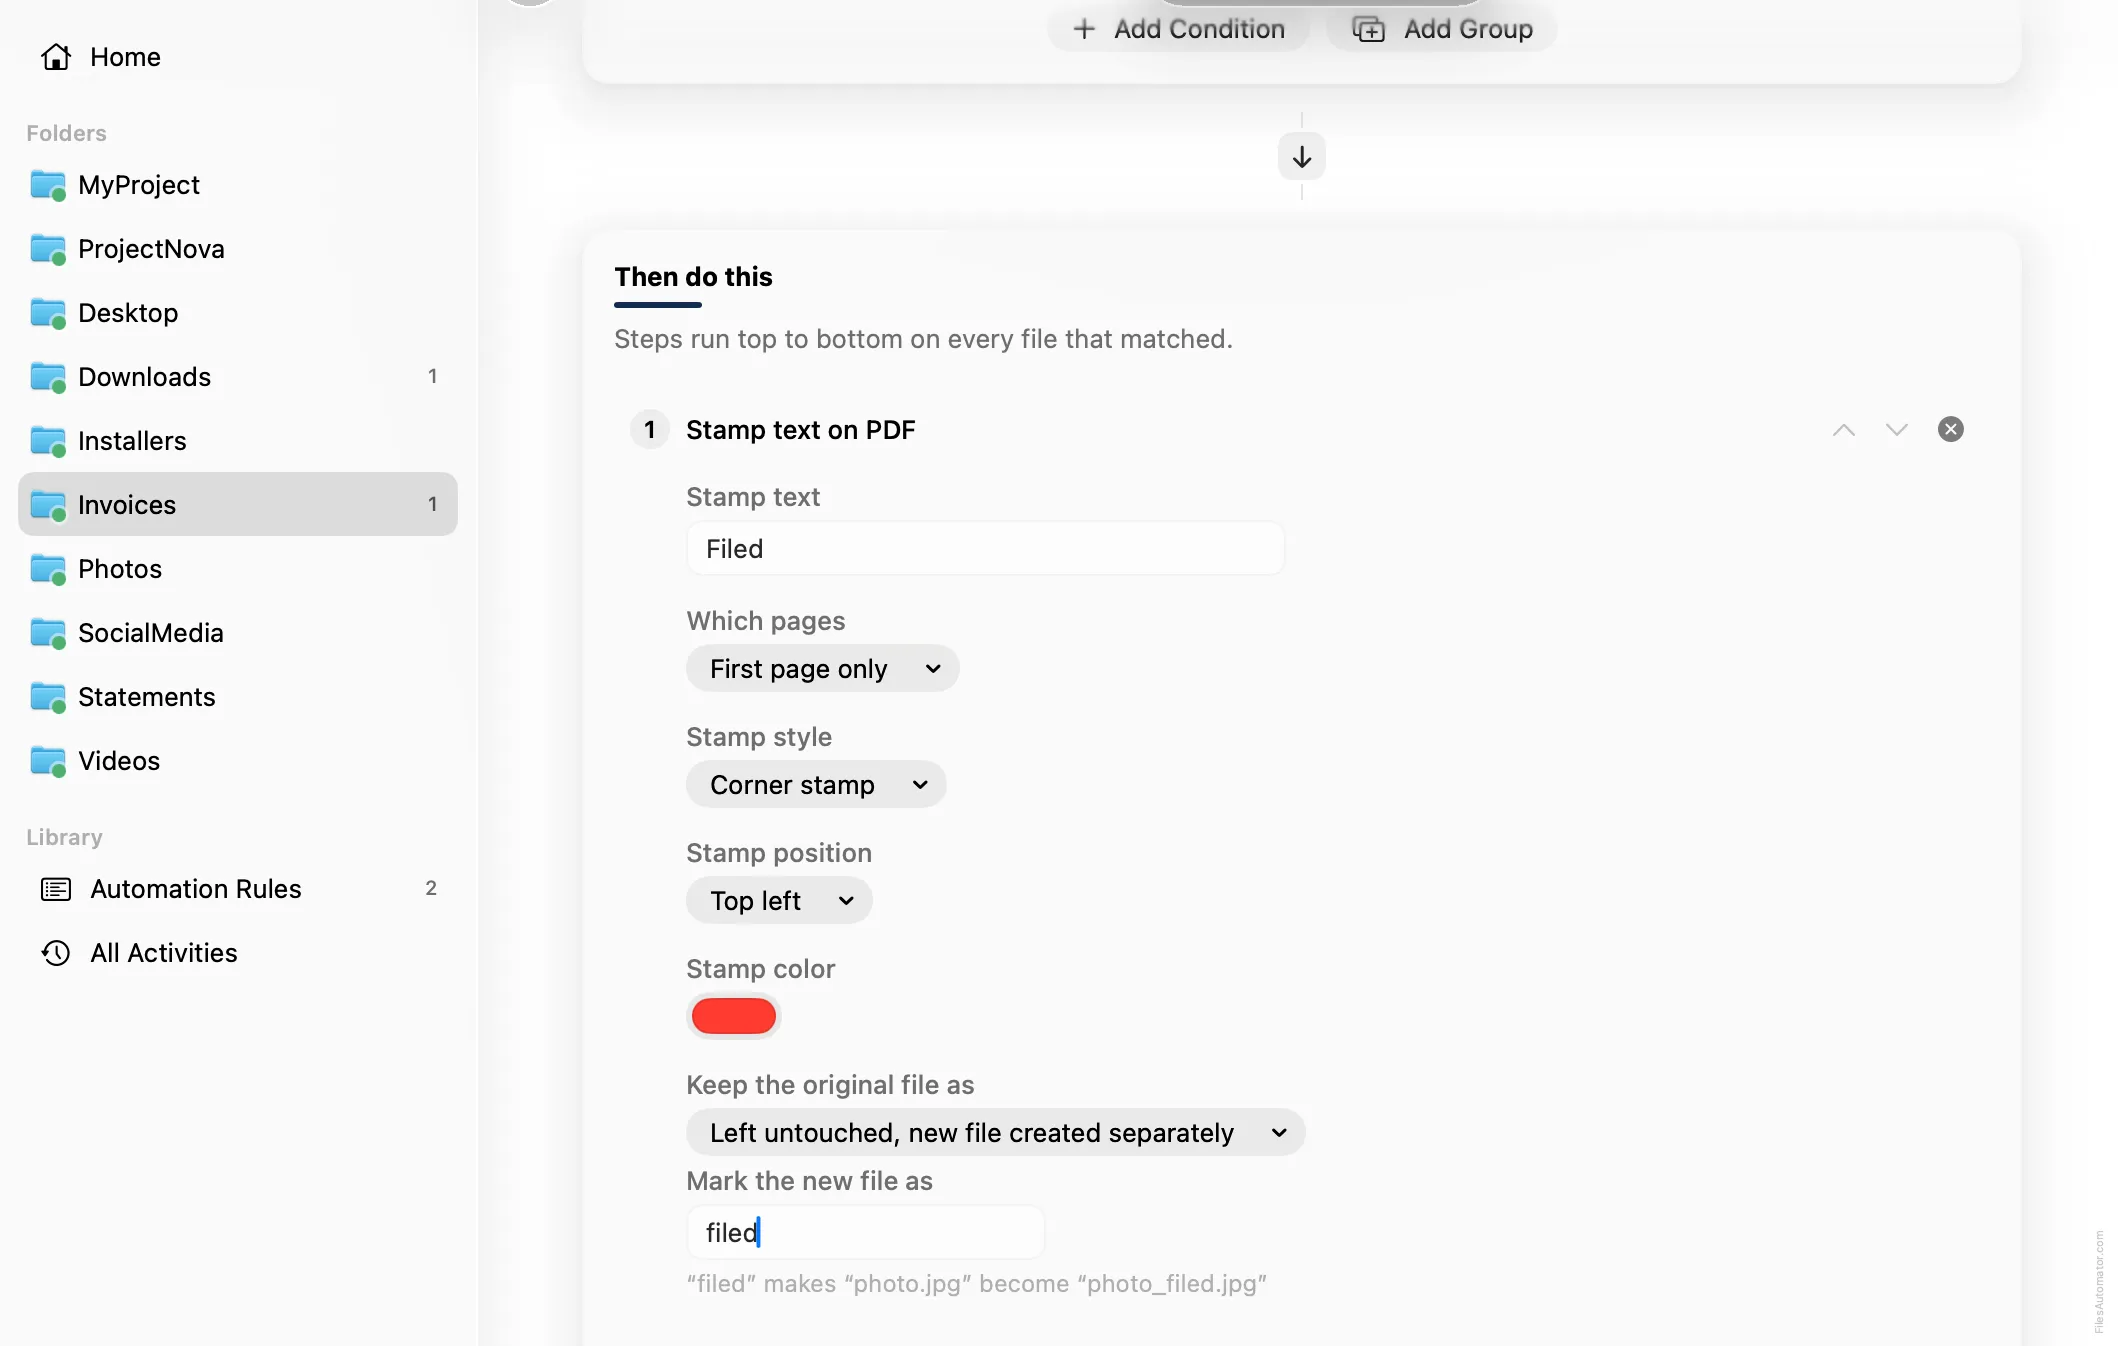
Step 1: Stamp text on PDF
Choose Add Step, then Stamp text on PDF. Type “Filed” into the “Stamp text” field. Leave Stamp style and Stamp position at their defaults, a small corner stamp is enough to mark a page as processed at a glance.
Set “Keep the original file as” to Left untouched, new file created separately, and “Mark the new file as” to “filed”, so the stamped copy is easy to tell apart from an unstamped one.
Turn it on
Select Create Automation Rule, then switch the rule on. Every PDF that lands here now gets stamped automatically, and the stamping is undoable from Activity.
A faster way
The template gallery inside FilesAutomator already has this rule ready to install, named Stamp filed PDFs.
Related rules
Get FilesAutomator
Everything in this guide happens inside FilesAutomator itself. Download it free from the Mac App Store to follow along, or to install this exact rule from the template gallery in one click instead of building it by hand.
Download on the App Store