How to automatically crop and resize photos for Instagram on Mac
Crop to a square, resize to 1080px, convert to JPEG, and strip location data, keeping the original
Intermediate · About 4 minutes
In this guide
What this does
This one is for when you know exactly where a photo is going: a square Instagram post. It chains three steps together, cropping every incoming photo to a perfect square, resizing it to Instagram’s own preferred 1080 pixels, then converting it to JPEG and stripping location data. All three steps keep their own copy, so nothing about your original photo ever changes.
Heads up on disk space: because each step keeps a copy, one source photo leaves four files behind, the original, a cropped version, a cropped and resized version, and the finished cropped, resized, and converted version. Nothing is ever silently lost, it’s simply a few extra files you can clean up later if you’d rather not keep every stage.
What you’ll build
A rule that matches any image, then crops it to a square, resizes it to 1080 pixels, and converts it to JPEG, in that order, keeping the original and every intermediate copy.
Open the rule editor
This walkthrough happens inside FilesAutomator itself, so install it from the Mac App Store first if you have not already, then open it. In its toolbar, choose Add, then New Automation Rule.
Name the rule and choose a folder
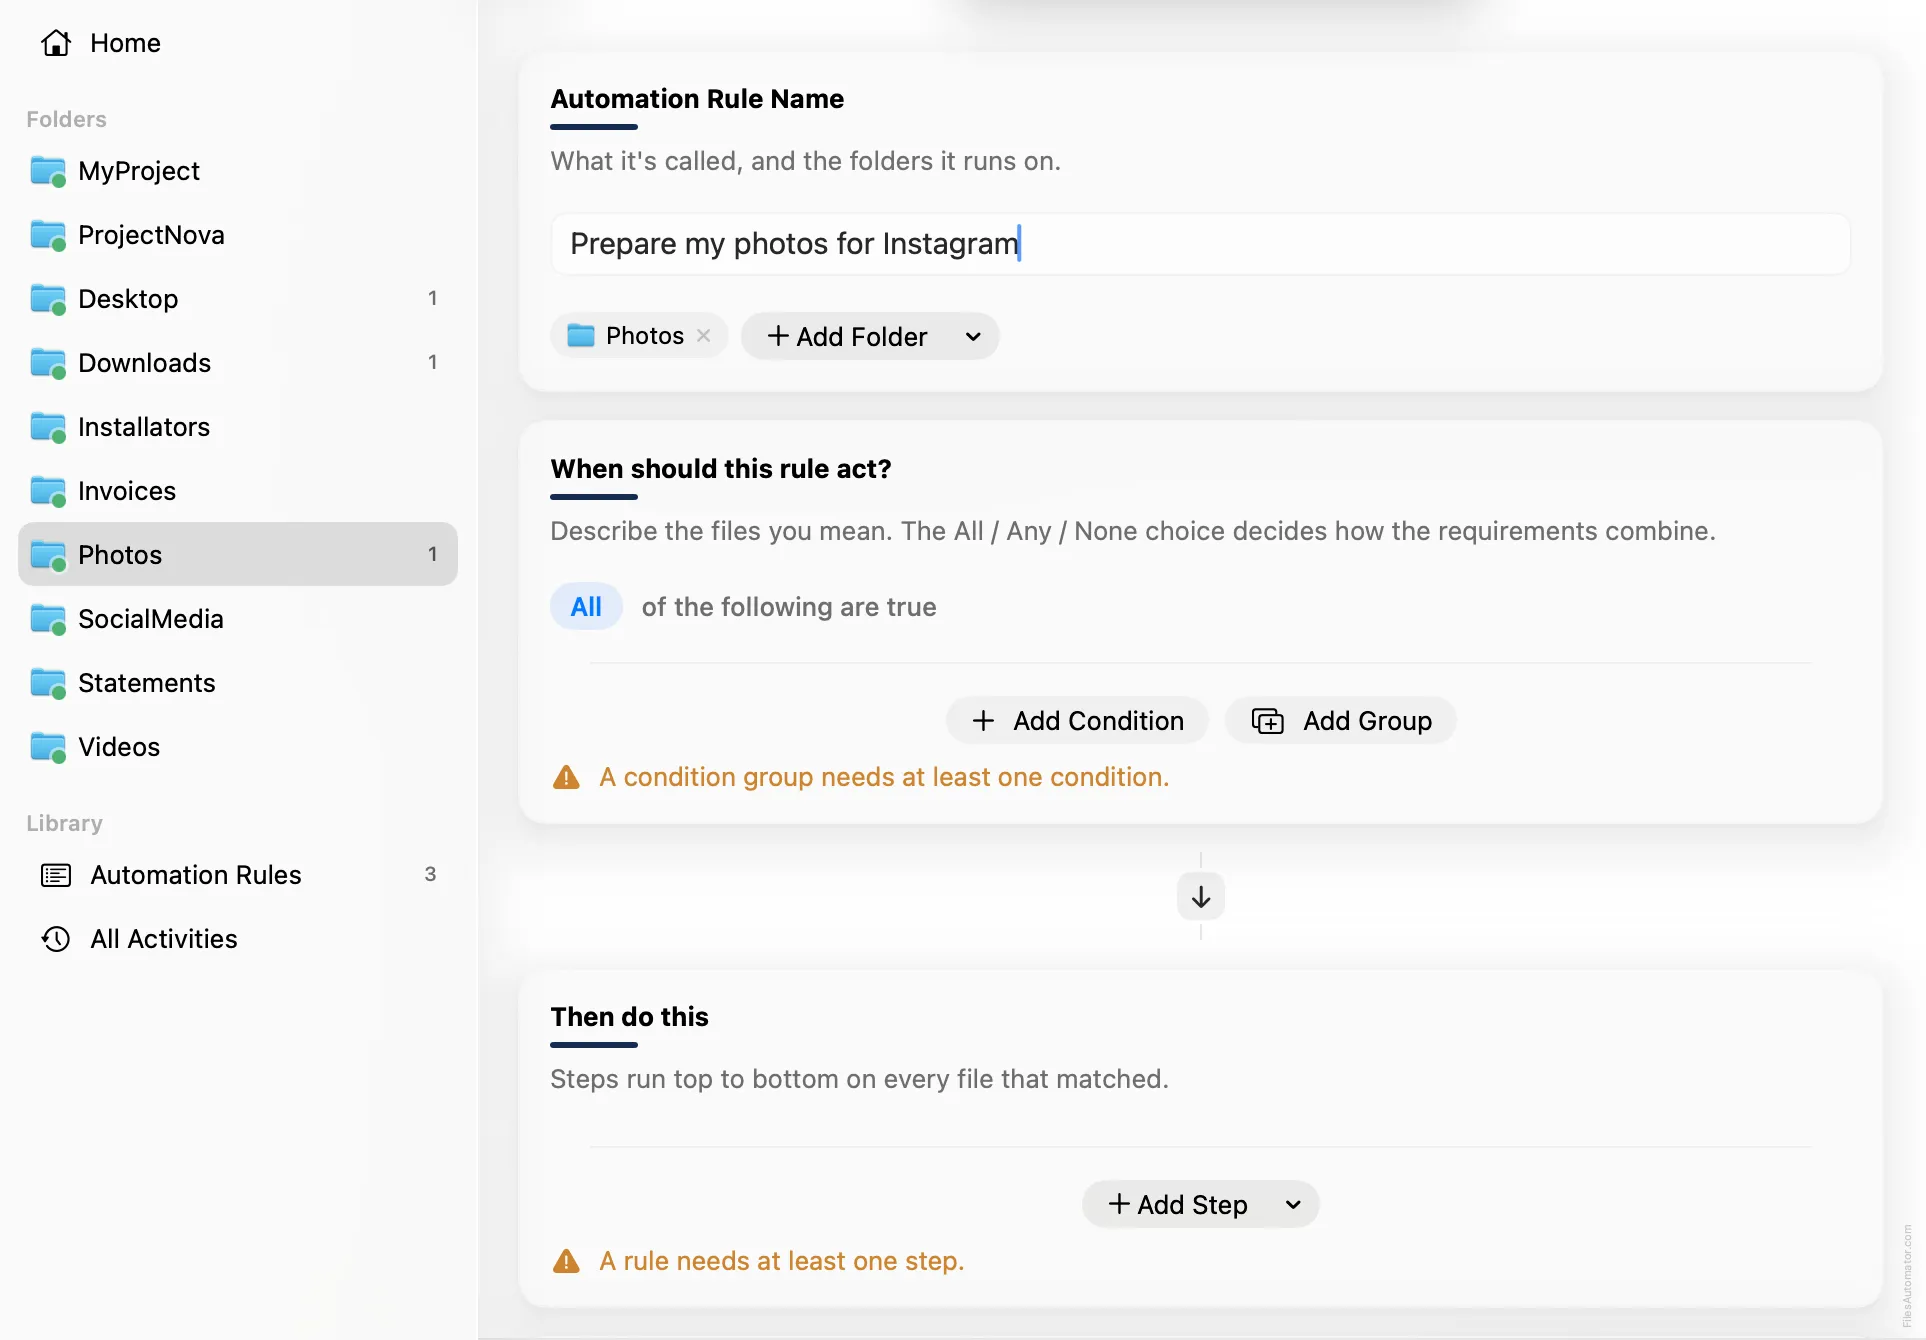
Name it something like “Prepare my photos for Instagram” and use Add Folder to choose the folder your photos land in.
Build the condition
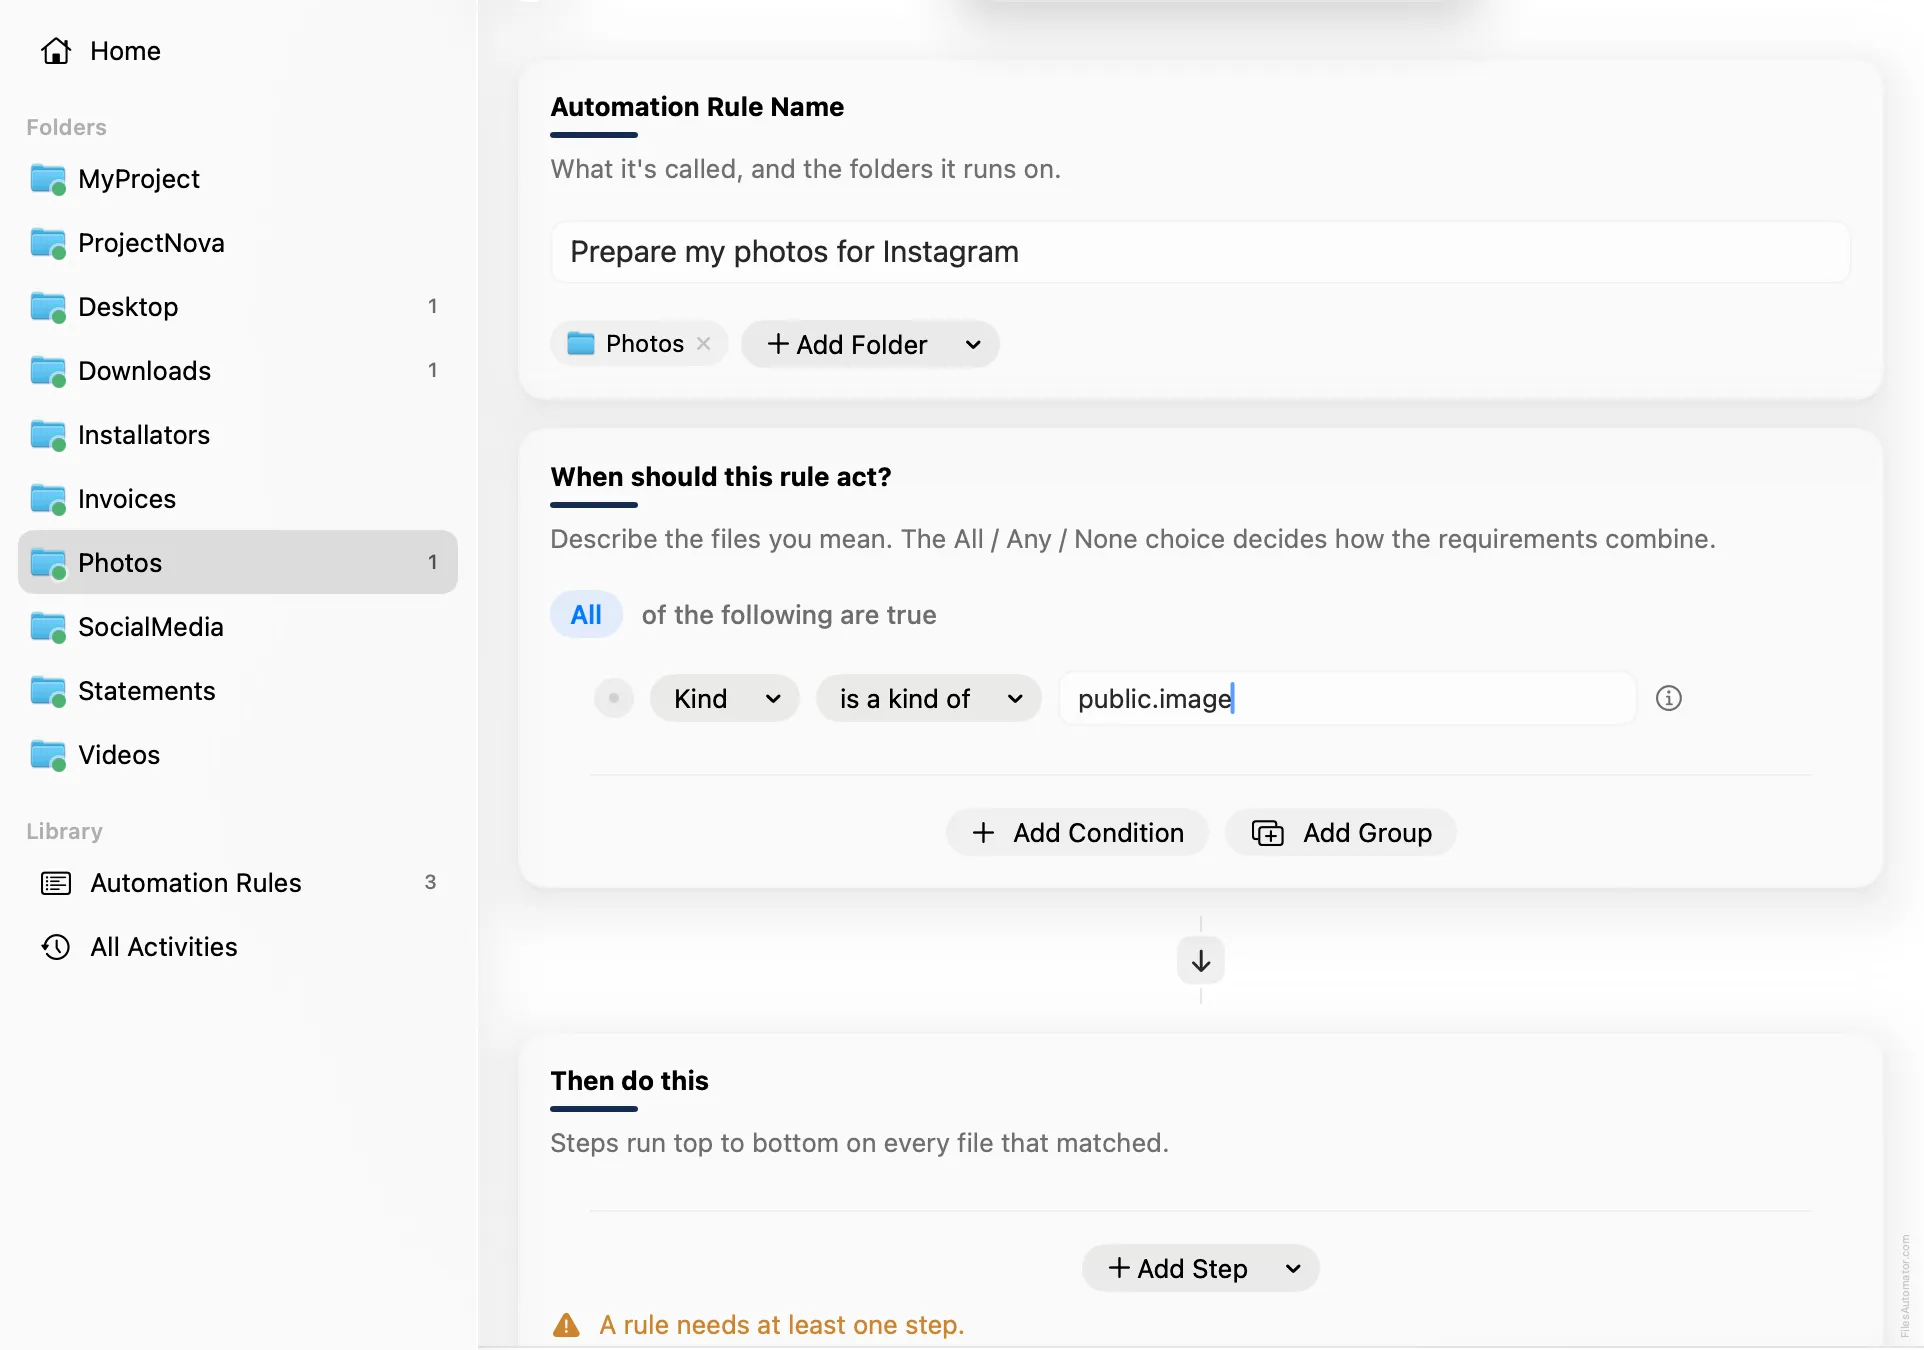
Add a single condition: Kind is a kind of public.image, which matches every image format.
Add the action steps
Step 1: Crop image
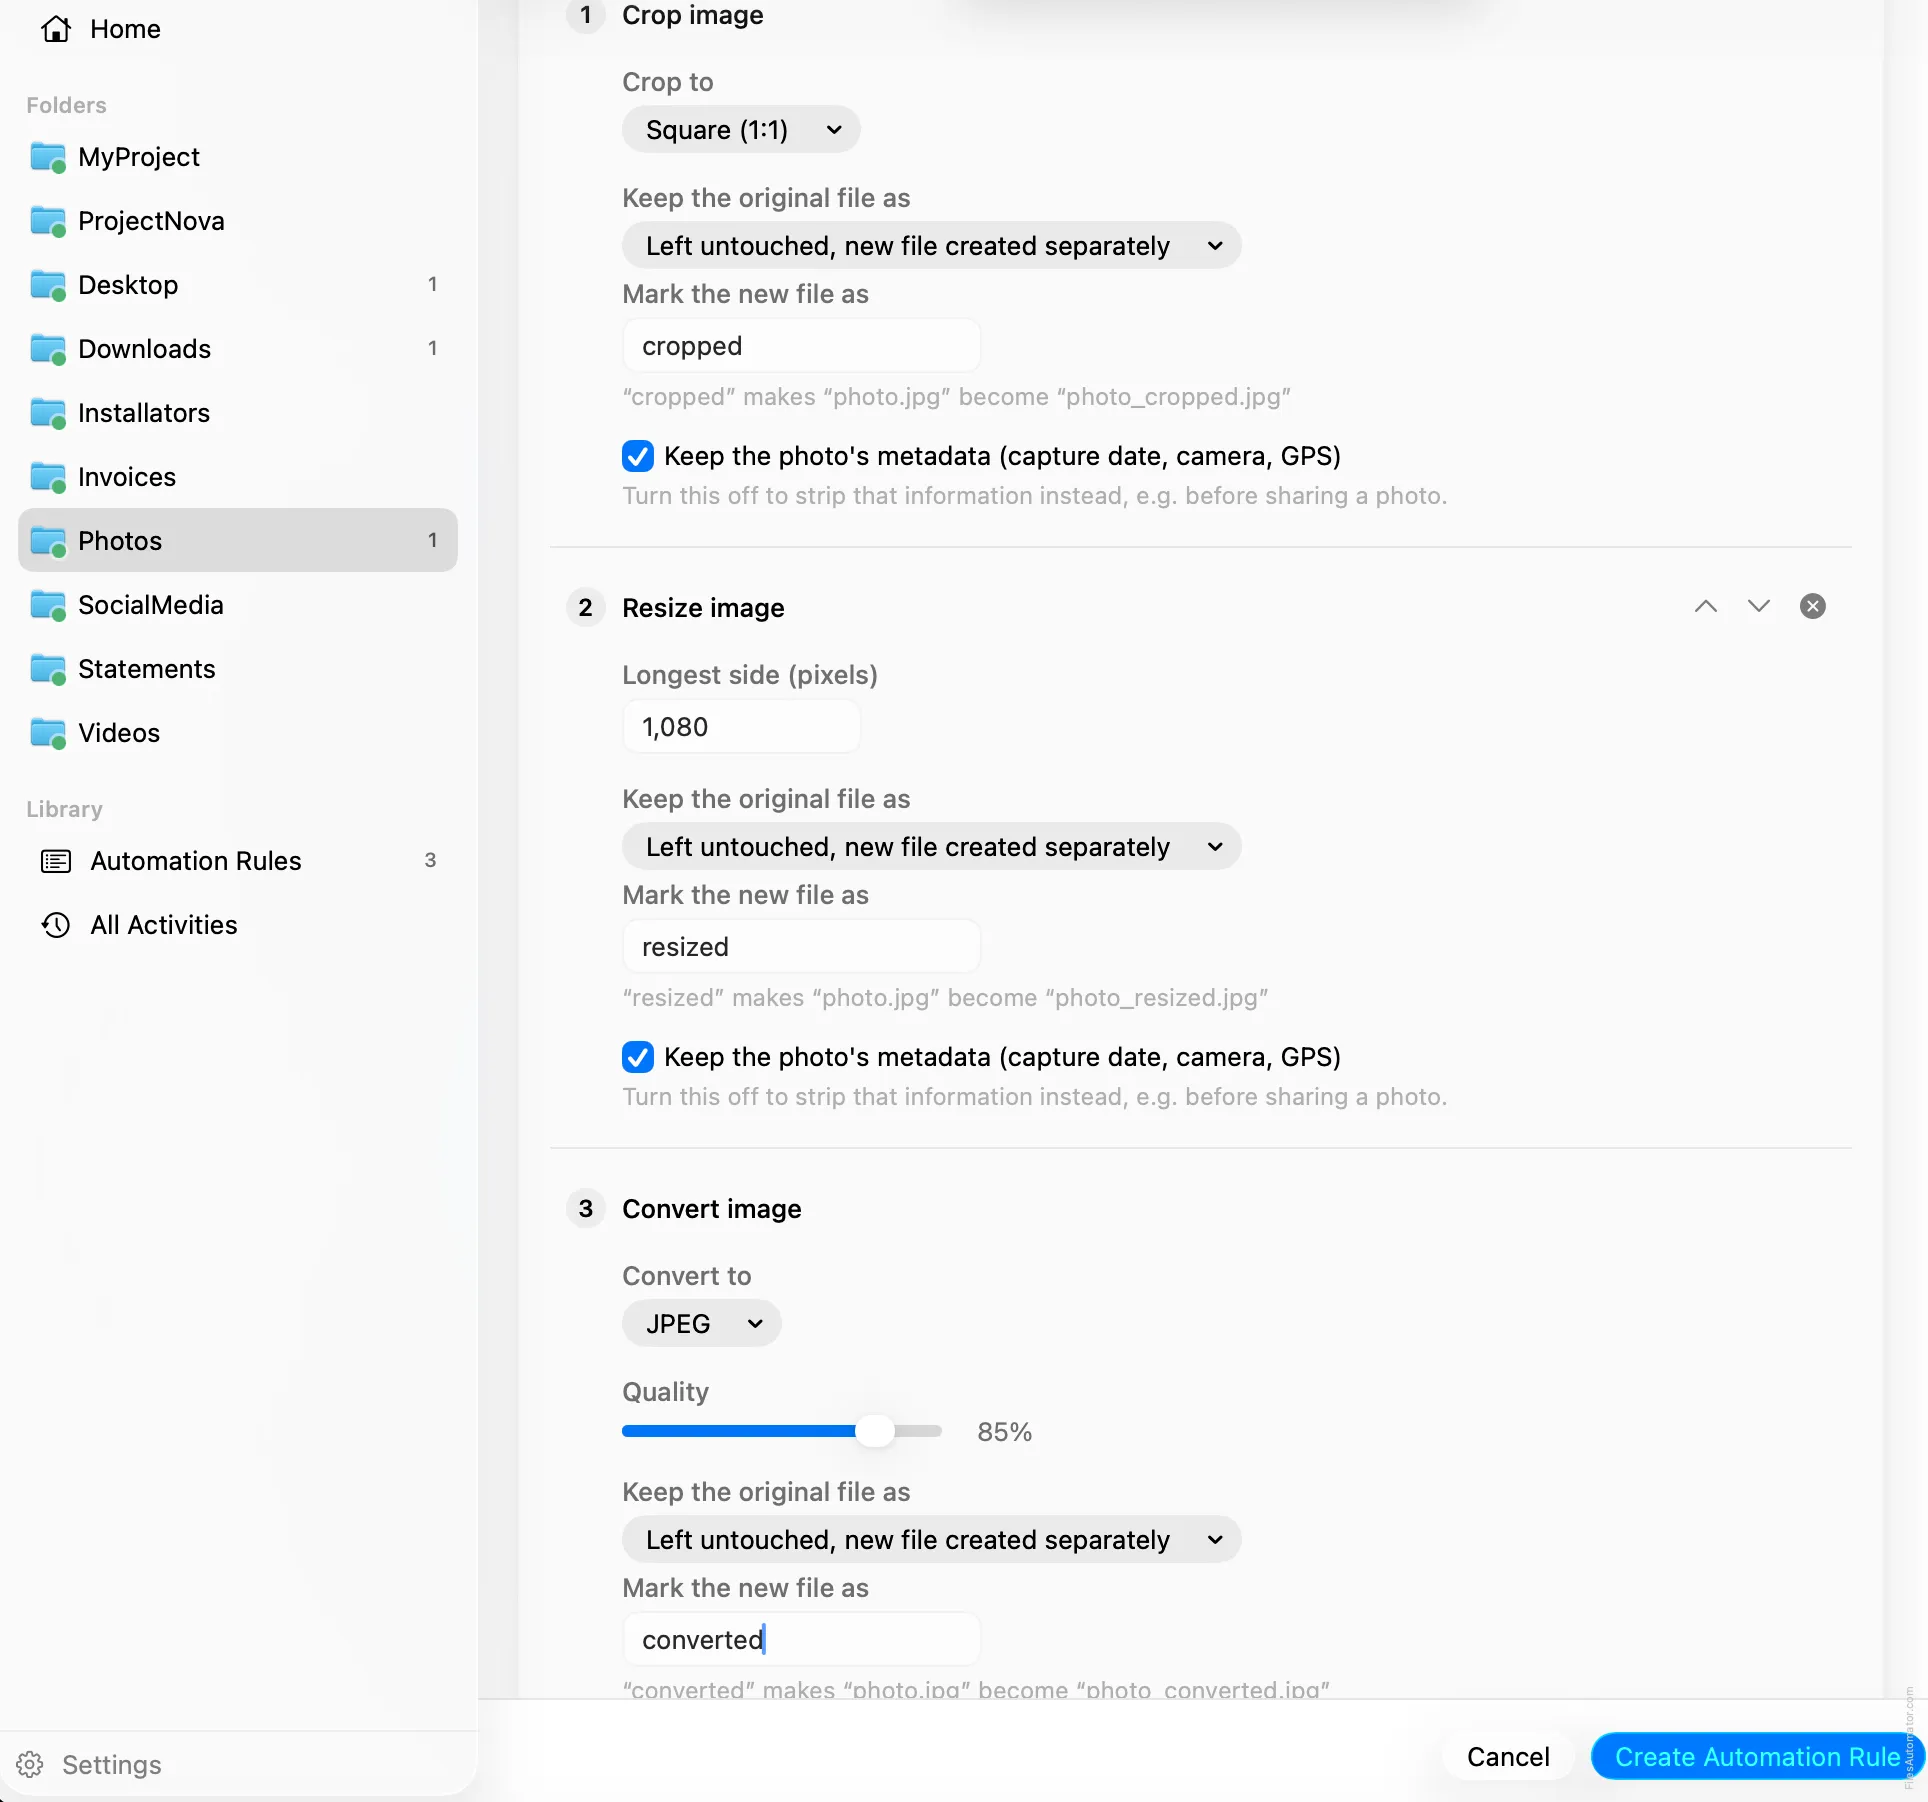
Choose Add Step, then Crop image. Set “Crop to” to Square (1:1). Set “Keep the original file as” to Left untouched, new file created separately, and “Mark the new file as” to “cropped”.
Step 2: Resize image
Choose Add Step again, then Resize image. Set “Longest side (pixels)” to 1080. Set “Keep the original file as” to Left untouched, new file created separately, and “Mark the new file as” to “resized”. This step runs on the cropped file from Step 1, since steps run top to bottom.
Step 3: Convert image
Choose Add Step once more, then Convert image. Set “Convert to” to JPEG, and turn off “Keep original metadata” to strip location data. Set “Keep the original file as” to Left untouched, new file created separately, and “Mark the new file as” to “converted”.
Turn it on
Select Create Automation Rule, then switch the rule on. Every photo dropped here now gets a square, Instagram ready JPEG waiting alongside it, with your original completely untouched.
A faster way
The template gallery inside FilesAutomator already has this rule ready to install, named Prepare photos for Instagram.
Related rules
How to prepare photos for Instagram Stories and Reels on Mac
Crop to a 9:16 vertical frame, resize to 1080x1920, convert to JPEG, and strip location data
How to prepare photos for YouTube thumbnails on Mac
Crop to a 16:9 frame, resize to 1280x720, convert to JPEG, and strip location data
How to resize photos for sharing on Mac
Shrink images to a social friendly size, strip location data, and keep the original alongside
Get FilesAutomator
Everything in this guide happens inside FilesAutomator itself. Download it free from the Mac App Store to follow along, or to install this exact rule from the template gallery in one click instead of building it by hand.
Download on the App Store